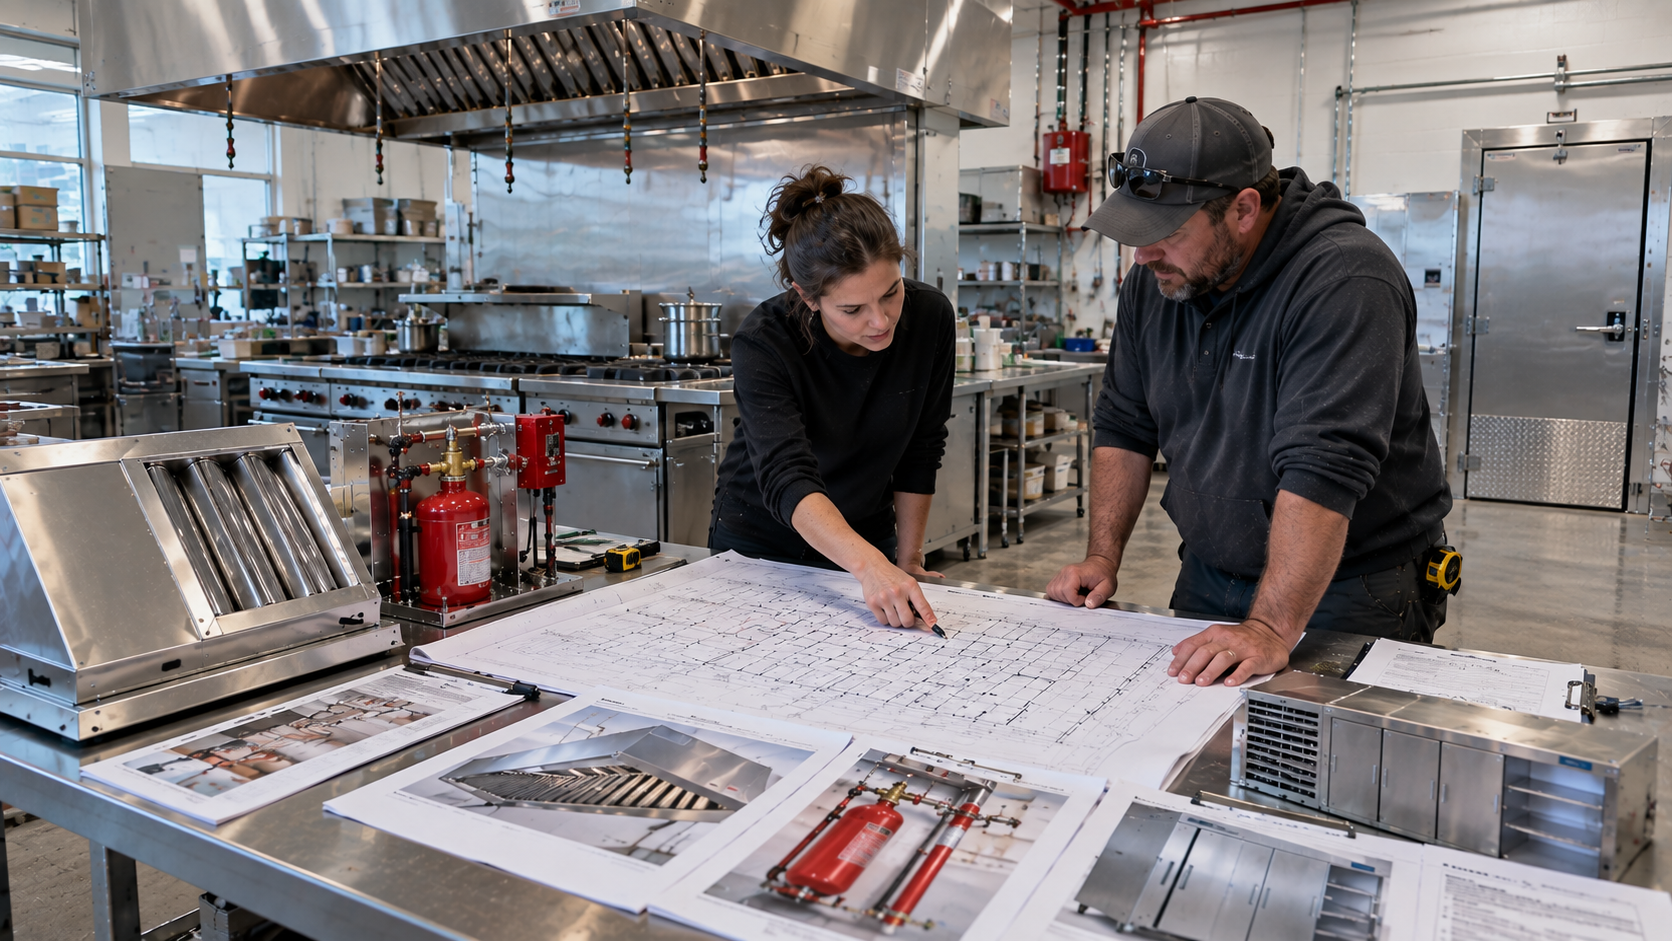

The Most Effective Solution for Commercial Kitchen Hood Installation

Gregg Kell VACRS

Why Commercial Kitchen Hood Installation is Critical for Restaurant Safety and Compliance

commercial kitchen hood installation - commercial kitchen hood installation

Commercial kitchen hood installation is essential for any restaurant or food service operation. It's not just equipment—it's a critical safety system that protects your staff, customers, and property.

Quick Answer: Commercial Kitchen Hood Installation Services

  • Service Area: Central Virginia (Charlottesville to Lexington)
  • Available: 24/7 emergency service with live answer
  • Cost Range: $5,000-$20,000 depending on hood type and size
  • Installation Timeline: Typically 2-5 days
  • Code Compliance: NFPA 96, IMC, and local fire marshal requirements
  • Contact: Reach out to our team anytime for same-day service

A properly installed commercial kitchen exhaust hood removes heat, smoke, grease particles, and cooking odors from your kitchen environment. Without this ventilation system, you risk grease buildup in ducts (a major fire hazard), poor air quality, excessive kitchen temperatures, and potential code violations that could shut down your operation.

The type of hood you need depends on your cooking equipment. Type I hoods are designed for grease-producing appliances like fryers and grills, while Type II hoods handle steam and heat from dishwashers and non-grease equipment.

Installation costs typically range from $950 to $1,200 per linear foot, meaning a standard 10-foot hood installation could cost approximately $10,000. This investment includes not just the hood itself, but also ductwork, exhaust fans, make-up air systems, and fire suppression equipment.

I'm Gregg Kell, a commercial kitchen ventilation specialist with over 15 years of experience in commercial kitchen hood installation throughout Virginia, helping restaurant owners steer complex ventilation requirements while ensuring safety and code compliance.

Diagram showing components of commercial kitchen hood installation system including hood canopy, filters, ductwork, exhaust fan, fire suppression system, and makeup air unit with directional arrows showing airflow from cooking surface through the system - commercial kitchen hood installation infographic

Why Every Restaurant Needs a Commercial Hood

Ever walked into a restaurant kitchen and felt that wall of heat, smoke, and cooking aromas hit you? That's exactly what your customers and staff experience without proper ventilation. Every commercial kitchen generates these byproducts during cooking operations, and without the right system in place, you're looking at more than just discomfort—you're facing serious safety risks.

A properly designed and installed commercial kitchen hood installation isn't just another piece of equipment—it's your first line of defense against potentially dangerous conditions in your kitchen.

Think about what happens when you're cooking on a busy Friday night. Grills sizzling, fryers bubbling, and ovens running at full capacity. All that activity produces:

Grease vapor that can coat your ductwork and create serious fire hazards if not properly captured and removed. This greasy buildup is actually the leading cause of restaurant fires nationwide.

Carbon monoxide and other cooking gases that can lead to headaches, fatigue, and respiratory issues for your hardworking staff when they're breathing these contaminants hour after hour.

Excessive heat that makes your kitchen feel like the inside of an oven, leading to staff discomfort, reduced productivity, and even heat-related illness during summer months.

Cooking odors that can drift into dining areas, affecting your customers' experience and potentially driving them away.

According to OSHA regulations on ventilation, proper air exchange is not just recommended—it's required to maintain a safe working environment. These aren't arbitrary rules—they're based on years of research showing the real health impacts of poor kitchen ventilation.

Functions & Benefits at a Glance

Modern hood systems are engineering marvels designed to keep your kitchen running safely and efficiently. They include several key components working together:

Capture jets create an invisible curtain of air that helps funnel smoke and grease up into the hood rather than escaping into your kitchen. This technology dramatically improves capture efficiency while potentially reducing energy costs.

Make-up air systems replace the air being exhausted, preventing negative pressure that can cause drafts, make doors hard to open, and reduce your hood's effectiveness. Without proper make-up air, your expensive hood system might not work as designed.

Exhaust fans provide the muscle to move contaminated air up and out. These workhorses need to be properly sized for your specific kitchen layout and cooking volume.

Ductwork forms the pathway from hood to outside world, safely channeling heat, smoke and grease-laden air away from your business. Proper duct design is critical for both safety and system efficiency.

When these components work in harmony, you'll notice improved air quality, more comfortable temperatures, and even potentially longer equipment life as less grease and moisture damage occurs.

Safety Standards You Can't Ignore

When it comes to commercial kitchen hood installation , cutting corners isn't just risky—it's potentially catastrophic. Several critical safety standards govern these systems:

NFPA 96 is the bible of commercial kitchen ventilation. This comprehensive standard covers everything from hood construction materials to fire suppression requirements. Compliance isn't optional—it's essential for safe operation.

International Mechanical Code provides additional requirements that your system must meet, particularly regarding mechanical aspects of the installation.

Local Authority Having Jurisdiction (AHJ) requirements may go beyond national codes. Your local fire marshal has the final say on whether your system passes inspection.

One crucial requirement you absolutely can't ignore: maintaining an 18-inch clearance between your hood system and any combustible materials. This safety buffer is non-negotiable unless you're using approved alternative methods.

Failing to meet these standards isn't just a minor issue—it can result in failed inspections, business closure until violations are fixed, insurance problems, and potentially devastating liability if something goes wrong.

At VA Commercial Repair Solutions, we take these standards seriously because we know what's at stake. Every commercial kitchen hood installation we perform meets or exceeds all applicable codes, giving you one less thing to worry about in your busy restaurant operation.

Want to learn more about the specifics of exhaust hoods and fans? Check out our detailed guide on EXHAUST HOODS AND EXHAUST FANS for additional information.

Picking the Perfect Hood: Type I vs Type II & Beyond

Selecting the right hood for your commercial kitchen is a crucial decision that impacts safety, compliance, and operational efficiency. The first step is determining whether you need a Type I or Type II hood based on your cooking equipment and processes.

Type I hoods (also called grease hoods) are designed for cooking equipment that produces grease-laden vapors, such as:

  • Fryers
  • Grills and griddles
  • Broilers
  • Woks and ranges
  • Ovens (except those specifically exempt)
  • Rotisseries

These hoods feature grease filters or extraction devices, must be constructed of 16-gauge stainless steel or other approved materials, and require integrated fire suppression systems.

Type II hoods (also called condensate hoods) are suitable for equipment that produces heat and moisture but not grease, such as:

  • Dishwashers
  • Steam tables
  • Some baking ovens
  • Pasta cookers

Type II hoods are typically simpler in design and don't require grease filters or fire suppression systems.

Beyond the basic type, you'll need to consider the hood's configuration:

  • Wall-mounted canopy hoods are installed against a wall and are the most common type
  • Island canopy hoods are suspended over cooking equipment in island configurations
  • Low-profile hoods are designed for kitchens with ceiling height limitations
  • Proximity (backshelf) hoods are mounted closer to cooking surfaces to improve capture efficiency

All commercial hoods should be UL-rated (typically UL 710 for performance) and constructed of durable materials like 16-gauge stainless steel for long-term performance.

Type I vs Type II Features

Feature Type I (Grease) Hood Type II (Condensate) Hood
Primary Use Grease-producing equipment Steam and heat-producing equipment
Construction 16-gauge stainless steel 18-gauge stainless steel
Fire Suppression Required Not required
Grease Filters Required Not required
Duct Requirements Welded, grease-tight Standard HVAC ductwork
Clearance to Combustibles 18 inches (unless reduced by approved methods) Standard HVAC clearances
Typical Cost Range $1,000-$1,200 per linear foot installed $700-$900 per linear foot installed
Inspection Frequency Monthly to quarterly Annual

Sizing & Layout Essentials

Proper sizing is critical for effective commercial kitchen hood installation . An undersized hood won't capture all cooking vapors, while an oversized hood wastes energy and increases costs unnecessarily.

Key sizing considerations include:

  • Hood Overhang : The hood should extend at least 6 inches beyond cooking equipment on all open sides, with 12 inches recommended for heavy-duty cooking operations.
  • Linear Foot Rule : A common rule of thumb is that the hood should be sized to the cooking equipment footprint plus the required overhang.
  • Ceiling Height : Higher ceilings may require larger hoods to maintain proper capture.
  • Island Clearances : Island configurations require more overhang (typically 12 inches) on all exposed sides.

The hood's mounting height is also critical—typically 6'6" to 7'0" above the finished floor, with the bottom edge of the hood 30-36 inches above cooking surfaces for optimal performance.

Key System Components

A complete commercial kitchen ventilation system includes several critical components beyond just the hood:

  • Filters and Baffles : These capture grease particles before they enter the ductwork. Options include baffle filters, mesh filters, and more advanced extraction technologies.
  • Duct Access Doors : Required by code, these provide access points for cleaning and inspection.
  • Upblast Exhaust Fan : Typically mounted on the roof, this fan creates the negative pressure needed to pull air through the system.
  • Roof Curb : Provides a watertight mounting surface for the fan on the roof.
  • Makeup Air Unit : Replaces air removed by the exhaust system to maintain proper building pressure.
  • Wet Chemical Fire Suppression System : Required for Type I hoods, these systems automatically deploy fire suppressant if flames are detected.
  • Control Panel : Manages fan operation, lighting, and often integrates with fire suppression and building management systems.

Commercial kitchen hood installation showing threaded rod mounting system - commercial kitchen hood installation

Step-By-Step Guide to Commercial Kitchen Hood Installation

Commercial kitchen hood installation is a complex process that requires careful planning, precise execution, and thorough testing. While we strongly recommend professional installation by qualified contractors like VA Commercial Repair Solutions, understanding the process helps you make informed decisions and ensures quality work.

Pre-Install Planning & Permits

Proper planning is essential for a successful installation:

  1. Blueprint and Layout Development : The first step is creating detailed plans showing hood placement, ductwork routing, and equipment locations. These plans must consider kitchen workflow, building structure, and code requirements.

  2. Load Calculations : Structural engineers must verify that the building can support the weight of the hood system, which can be substantial—especially for large stainless steel hoods with fire suppression systems.

  3. Fire Marshal Review : In most jurisdictions, plans must be submitted to the local fire marshal for review and approval before installation begins. This review ensures compliance with fire safety codes.

  4. Building Permits : Permits are typically required for hood installation, with fees ranging from $100 to $500 depending on the jurisdiction and project scope.

  5. Timeline Development : A realistic installation timeline should account for equipment delivery, coordination with other trades (electrical, plumbing, roofing), and inspection schedules.

The planning phase typically takes 2-4 weeks, depending on permit approval times and project complexity.

The Installation Process Explained

The actual installation follows a logical sequence:

  1. Equipment Delivery and Inspection : When the hood arrives, it should be carefully uncrated and inspected for shipping damage before installation begins.

  2. Hood Positioning : The centerline of the hood is marked on the ceiling, ensuring proper alignment with cooking equipment below.

  3. Mounting System Installation : Typically, ½-inch threaded rods are anchored to structural ceiling members to support the hood. The number and placement of these rods depend on hood size and weight.

  4. Hood Hanging and Leveling : The hood is carefully lifted into position, attached to the mounting rods, and precisely leveled in all directions.

  5. Ductwork Installation :

    • The exhaust collar is welded to the hood
    • Ductwork is run from the hood to the exhaust fan location (typically the roof)
    • All seams are welded liquid-tight to prevent grease leakage
    • Access doors are installed at required locations for future cleaning
  6. Exhaust Fan Installation : The fan is mounted on a roof curb, connected to the ductwork, and wired to the control system.

  7. Make-up Air System Installation : The make-up air unit is installed, connected to ductwork, and integrated with the control system.

  8. Fire Suppression System Installation : Nozzles are positioned above cooking equipment, the suppression agent tank is installed, and the system is connected to gas shutoff valves and the fire alarm system if required.

  9. Control System Wiring : The hood's lights, fans, and fire suppression monitoring are wired to the control panel.

  10. System Charging and Testing : The fire suppression system is charged with the appropriate agent and tested to ensure proper operation.

Commercial kitchen hood installation process showing ductwork connection - commercial kitchen hood installation

Post-Install Code & Performance Checks

After installation, several critical tests ensure the system functions properly:

  1. Smoke Test : This visual test uses a smoke source to verify that the hood captures all vapors effectively.

  2. CFM Measurement : Airflow is measured to confirm that the system moves the proper volume of air based on design specifications.

  3. Static Pressure Testing : Pressure measurements verify that the system operates within design parameters.

  4. Hood Capture Velocity : Air velocity at the hood face is measured to ensure proper capture efficiency.

  5. Fire Suppression Testing : The fire suppression system is tested (without discharging agent) to verify proper operation.

  6. Final Inspection : The local fire marshal and building inspector conduct a final review to verify code compliance before issuing approval for use.

  7. Commissioning Report : A detailed report documents all test results, confirming that the system meets design specifications and code requirements.

These tests not only ensure compliance but also establish baseline performance metrics for future reference. Proper documentation of these tests is essential for both regulatory compliance and system maintenance.

Budget, Compliance & Common Pitfalls

Let's talk money—because I know that's probably one of your biggest concerns when considering a commercial kitchen hood installation . As a restaurant owner, you need to balance safety with your budget, and understanding the costs upfront helps avoid those heart-stopping surprises later.

While every installation is unique (just like your restaurant!), here's what you can typically expect to invest:

  • Hood Unit : $950-$1,200 per linear foot (so a 10-foot hood would run you $9,500-$12,000)
  • Labor : $500-$1,500 depending on how tricky the installation is
  • Ductwork : $200-$2,000 based on length and routing complexity
  • Fire Suppression System : $2,000-$5,000 for a standard restaurant setup
  • Permits and Inspections : $100-$500 depending on your local requirements
  • Exhaust Fan and Make-up Air : $300-$1,500 combined

For most restaurants with a standard 10-foot hood, you're looking at a total investment between $12,000 and $20,000. I know that's a significant chunk of change, but remember—this system protects your entire business from devastating fires, keeps your staff comfortable, and prevents those dreaded code violations that could shut you down.

Commercial kitchen with professional hood installation - commercial kitchen hood installation

How Kitchen Layout & Materials Change the Price

Your specific kitchen setup can significantly impact what you'll pay. Think of it like buying a car—the base model gets you from A to B, but those extras add up quickly!

Hood length is perhaps the most obvious factor—longer hoods cost more not just for the unit itself, but also for additional support structures, ductwork, and fire suppression coverage. It's like buying a bigger TV—the price doesn't just increase with screen size, but with everything that supports it.

Material quality matters too. While 16-gauge stainless steel is standard for Type I hoods (and looks pretty sharp!), upgraded finishes or custom designs will bump up your investment. That beautiful copper-finished hood might look amazing, but your wallet will definitely feel it.

Mounting location can actually save you money. An exterior wall mount typically reduces ductwork length and labor costs compared to installations requiring long duct runs through the building. Less duct means less material and less labor—a win-win!

Roof penetrations might sound simple, but complex roof structures often require additional waterproofing and structural modifications. It's like the difference between hanging a picture on drywall versus trying to mount it on brick—sometimes what seems straightforward gets complicated fast.

Retrofits versus new construction is another major consideration. Installing a hood in an existing building typically costs more than including it in new construction due to structural modifications and working around existing systems. It's always easier (and cheaper) to build it right the first time than to modify later.

At VA Commercial Repair Solutions, we believe in transparency. Our quotes break down all these costs so you understand exactly what you're paying for—and where you might find savings without cutting corners on safety.

Avoid These Installation Mistakes

Even seasoned contractors sometimes make errors during commercial kitchen hood installation . I've seen them all, and trust me—these mistakes can cost you big time down the road.

Improper clearances are perhaps the most dangerous oversight. Failing to maintain that critical 18-inch clearance to combustible materials creates serious fire hazards and code violations. It's like parking too close to a fire hydrant—it might seem harmless until there's an emergency.

Negative building pressure happens when exhaust systems remove more air than is replaced. This can make doors difficult to open, create uncomfortable drafts, and significantly reduce hood performance. I've seen restaurant doors that practically sucked people in from the parking lot because of this issue!

Inadequate make-up air forces your hood to work harder than necessary, reducing capture efficiency and potentially causing backdrafting of combustion appliances. This is not only inefficient but can introduce dangerous carbon monoxide into your kitchen.

Skipped fire suppression is terrifyingly common when contractors try to cut corners. Some may try to save costs by omitting or improperly installing fire suppression systems, creating serious safety hazards that put your entire business at risk.

Using unlisted components might seem like a minor issue, but all parts (filters, fans, etc.) must be listed for their intended use in commercial kitchen applications. Using the wrong components is like putting regular tires on a race car—they might fit, but they're not designed for the job.

Missed inspections during installation can result in costly rework if issues are found later. It's always better to catch problems during the installation process than after everything is finished and your kitchen is operational.

By working with experienced professionals like our team at VA Commercial Repair Solutions, you can avoid these headaches and ensure a safe, compliant installation from day one.

Incentives & Long-Term Savings

While the initial cost of a commercial kitchen hood installation might make your eyes water, several factors can actually offset this investment over time.

Demand Control Ventilation systems adjust exhaust rates based on cooking activity, reducing energy costs by up to 30%. Think of it like a smart thermostat for your hood—it only works as hard as it needs to, saving energy when cooking activity is light.

Energy-Efficient Hoods with Energy Star ratings may qualify for utility rebates and tax incentives while reducing your monthly utility bills. These modern systems pay for themselves over time through lower operating costs.

Utility Rebates are offered by many power companies for energy-efficient kitchen ventilation systems. These can sometimes knock thousands off your initial investment, making the upgrade to efficient equipment much more affordable.

Tax Credits at the federal, state, or local level may be available for energy-efficient installations. Our team can help identify which incentives apply to your specific situation.

According to the Department of Energy, demand ventilation systems are required to be on at least 75% of the exhaust air, with a capability of at least 50% reduction in exhaust and replacement air. This requirement reflects just how much energy (and money) these systems can save.

Long-term, these energy-efficient systems not only reduce your monthly bills but also improve kitchen comfort and reduce environmental impact. Your staff will appreciate a cooler kitchen, and Mother Nature will thank you for the reduced carbon footprint.

At VA Commercial Repair Solutions, we don't just install your hood and disappear. We help you identify and apply for available incentives to maximize your return on investment, ensuring your new system benefits your bottom line for years to come.

Maintaining Peak Performance After Installation

After your commercial kitchen hood installation is complete, the real work of keeping it running safely and efficiently begins. Think of your hood system like a car – regular maintenance isn't just recommended, it's essential for safety, compliance, and peak performance.

The National Fire Protection Association doesn't leave this to chance. Their NFPA 96 standard requires specific cleaning schedules based on your cooking volume:

  • Monthly cleaning for restaurants using solid fuels like wood or charcoal
  • Quarterly service for high-volume kitchens (think 24-hour diners or heavy frying operations)
  • Semi-annual maintenance works for moderate-volume cooking establishments
  • Annual inspections at minimum for low-volume operations like churches or seasonal businesses

I've seen what happens when restaurant owners skip maintenance – grease buildup turns ductwork into a fire waiting to happen. Beyond the obvious safety risks, neglected systems work harder, use more energy, and break down faster. It's penny-wise but pound-foolish to delay regular service.

Service Schedule & Costs

Good news – maintenance costs are predictable and can be budgeted as regular operating expenses. Here's what most of our Central Virginia clients typically spend:

Hood cleaning runs about $100-$200 per cleaning session, typically done quarterly. Your filters will cost $50-$150 each when they need replacement. The annual fire system inspection (required by law) ranges from $100-$300, while comprehensive exhaust fan service averages $200-$400 annually.

What should a proper maintenance visit include? When our technicians service your system, they'll check every component:

We inspect and clean filters, looking for damage that could affect performance. The hood plenum gets thoroughly degreased. We examine all accessible ductwork, clean fan blades and housing, check belts and bearings, verify your fire suppression system is operational, test all controls, and confirm proper airflow volumes.

At VA Commercial Repair Solutions, we create customized maintenance programs based on your specific kitchen operation. Our technicians don't just clean – they're trained to spot potential issues before they become expensive emergencies. That's why so many restaurants throughout Charlottesville, Harrisonburg and Lexington trust us with their ventilation maintenance.

When to Upgrade or Retrofit

Even well-maintained systems eventually need upgrades. Here are signs it might be time for improvements:

Rising energy bills often signal that newer technology could help. Modern systems with variable frequency drives and demand control ventilation can cut energy use dramatically.

Persistent smoke spillage or excessive kitchen heat suggests your current system no longer matches your needs. Sometimes code changes require modifications to stay compliant, and equipment changes (like adding a new fryer or grill) often necessitate ventilation adjustments.

Today's upgrade options offer impressive returns on investment. Energy monitoring systems track usage and identify savings opportunities. Smart controls automatically adjust fan speeds based on cooking activity, while VFD fans reduce consumption during slower periods. Some restaurants are adding UV technology that breaks down grease particles in ductwork, reducing cleaning frequency and fire risk.

Our team can evaluate your existing system and recommend targeted upgrades that improve performance while reducing operating costs. We focus on practical solutions that deliver real value – not just selling you the latest gadgets.

Commercial kitchen hood maintenance showing filter cleaning - commercial kitchen hood installation

Proper maintenance isn't just about compliance – it's about protecting your investment, your property, and most importantly, your people. If you're looking for reliable Range Hood Repair services or have questions about maintaining your system, we're just a phone call away – and unlike many companies, you'll always reach a real person, not a voicemail.

Frequently Asked Questions about Commercial Kitchen Hood Installation

How long does a typical commercial kitchen hood installation take?

When restaurant owners ask me about timelines for their commercial kitchen hood installation , I usually tell them to plan for 2-5 days from start to finish. But I always explain that several factors can influence this:

The complexity of your system makes a big difference. A straightforward 8-foot hood with minimal ductwork might be completed in just 2 days, while a 14-foot hood with complex ductwork running through multiple floors could take a full work week.

Your building's structure plays a role too. In older buildings, we sometimes find structural elements that need reinforcement to support the hood system safely. These modifications add time but are absolutely essential for safety.

Permit processing varies dramatically between jurisdictions. Some areas provide permits within days, while others might take weeks. We help steer this process to minimize delays, but it's good to plan ahead.

Coordination with other trades is another consideration. We need to work hand-in-hand with electricians for wiring, plumbers for fire suppression connections, and sometimes roofers for exhaust fan installation. This orchestration takes careful planning.

At VA Commercial Repair Solutions, we provide detailed installation timelines during the quoting process, and we'll keep you updated every step of the way. We understand that kitchen downtime affects your bottom line, so we work efficiently to minimize disruptions.

Can I use a ductless system in a grease-heavy kitchen?

I get this question surprisingly often, and the answer is a clear and definite no. Ductless hoods (sometimes called recirculating hoods) simply cannot handle grease-heavy cooking operations safely or effectively.

While these systems might work fine in limited applications like warming prepared foods or reheating, they're completely inadequate for:

Commercial cooking equipment like fryers, grills, charbroilers, woks, or any appliance that produces significant grease vapors or smoke. The filters in ductless systems quickly become saturated with grease, dramatically reducing their effectiveness and creating fire hazards.

The National Fire Protection Association (NFPA 96) code specifically requires Type I hoods with external exhaust for grease-producing cooking operations. Most local health departments enforce this requirement strictly – and for good reason.

The fundamental problem is that ductless systems filter and recirculate air within the kitchen rather than removing it from the building. This approach simply cannot effectively capture and remove grease-laden vapors, smoke, and heat generated by commercial cooking.

Installing a ductless system in a grease-heavy kitchen environment creates serious fire risks, compromises indoor air quality, and violates codes in ways that could result in hefty fines or even forced business closure. It's just not worth the risk.

What happens if my hood fails an inspection?

Finding out your hood system failed inspection can be stressful, but understanding the process helps you respond effectively. Here's what typically happens:

First, the inspector provides a written report detailing specific violations. This documentation is crucial – it's your roadmap for corrections. The report will identify exactly what needs fixing, whether it's excessive grease buildup, damaged filters, or fire suppression issues.

Next, you'll receive a compliance timeline – usually 30-90 days to correct violations, depending on their severity. Critical safety issues might require immediate attention, while minor violations allow more time for corrections.

A follow-up inspection will be scheduled to verify that all issues have been addressed properly. This is your opportunity to demonstrate compliance and commitment to safety standards.

For serious violations, especially those compromising fire safety, consequences can include fines, mandatory system shutdown, or even temporary suspension of business operations until corrections are made.

Common reasons hoods fail inspection include:

  • Excessive grease accumulation in hoods or ductwork
  • Missing, damaged, or improper filters
  • Improperly maintained fire suppression systems
  • Unauthorized modifications made without permits
  • Inadequate cleaning documentation

At VA Commercial Repair Solutions, we offer pre-inspection services to identify and correct potential issues before official inspections occur. Think of it as a dress rehearsal that helps prevent surprises. And if you've already failed an inspection, don't panic – our emergency response team can quickly address violations to get your kitchen back up to code and operational again.

Commercial kitchen hood inspection showing fire suppression system check - commercial kitchen hood installation infographic

Conclusion

Your restaurant's commercial kitchen hood isn't just another piece of equipment—it's the guardian of your business's safety, compliance, and success.

A properly installed commercial kitchen hood installation protects everything you've worked for. It safeguards your staff from harmful air contaminants, shields your property from devastating grease fires, and ensures you stay on the right side of health and safety regulations that could otherwise shut your doors.

Throughout this guide, we've walked through the critical elements of commercial hood systems—from the initial planning stages to long-term maintenance. We've seen how these systems do far more than just remove smoke; they create a safer, more comfortable environment for both your kitchen team and your customers.

Cutting corners on ventilation is never worth the risk. The upfront investment in professional installation pays dividends through:

  • Reduced fire hazards (protecting both lives and your investment)
  • Lower insurance premiums (many carriers offer discounts for properly installed systems)
  • Improved staff retention (comfortable kitchens mean happier employees)
  • Improved energy efficiency (modern systems can significantly reduce utility costs)

Here at VA Commercial Repair Solutions, we've been installing and servicing commercial kitchen hoods throughout Central Virginia for years. From Charlottesville to Lexington, our team has become the trusted partner for restaurants that refuse to compromise on safety and quality.

What makes our approach to commercial kitchen hood installation different? It starts with our commitment to being there when you need us. We answer every call live—you'll never reach voicemail when you need help. Our technicians arrive with fully-stocked trucks and the expertise to solve problems quickly and correctly the first time.

We believe in repairing rather than replacing whenever possible, saving you money without sacrificing safety or performance. And we stand behind our work with guarantees that give you peace of mind long after the installation is complete.

Don't leave your kitchen's ventilation to chance. Your business deserves the protection that comes from professional commercial kitchen hood installation by a team that understands both the technical requirements and the local codes that govern your operation.

Ready to ensure your kitchen is properly ventilated, code-compliant, and operating at peak efficiency? Contact VA Commercial Repair Solutions today. We're standing by to answer your call—a real person, ready to help with your commercial kitchen ventilation needs.
September 4, 2026
 A power outage does more than turn off the lights for a Virginia business. Production lines stop, refrigerated inventory spoils, and servers can lose data in seconds. Berkeley Lab's interruption-cost research puts the toll on U.S. businesses in the billions every year. Virginia's commercial generator market splits between two kinds of installers. Some are electrical contractors who added generators to a broader service list. Others are dedicated power specialists who sell, size, and service backup systems full time. The average U.S. electricity customer already loses about 341 minutes a year to non-momentary outages, per EIA reliability data . For a commercial kitchen or a cold storage facility, that adds up to real, repeated risk. This guide covers the eight best commercial generator installation companies in Virginia. Each was evaluated on service area, brand relationships, installation depth, and commercial support. Virginia's Top Commercial Generator Installers, At a Glance VA Commercial Repair Solutions engineers and installs standby power for commercial and industrial clients across central Virginia. The Power Connection is a Harrisonburg-based generator specialist serving the Shenandoah Valley and beyond. Carter Power Systems, the Caterpillar dealer's power division, handles industrial-scale generators statewide. Elite Power & Energy Corporation is a veteran-owned, multi-brand dealer serving Northern Virginia, Maryland, and DC. RECORE specializes in Energy-as-a-Service standby power for Hampton Roads businesses. Prestige Electric handles Generac-certified generator installation across the Tidewater region. SS Electrical Solutions installs and maintains Generac systems for Richmond-area homes and businesses. McGrady-Lambert Electric brings generator installation to Roanoke's commercial and industrial facilities.
September 4, 2026
 Choosing between HVAC maintenance companies is not the same as choosing who can replace a belt or change filters. For a commercial facility, the right partner affects operating costs, comfort complaints, food safety, production uptime and how quickly your team gets help when a rooftop unit quits during peak hours. The best comparison starts before you ask for a quote. You need a clear view of your equipment, your risk level and the response you expect when something breaks. A small office, a restaurant with walk-in coolers and a poultry processing facility do not need the same maintenance scope, even if all three have packaged HVAC equipment on the roof. Use the following framework to compare vendors with less guesswork and fewer surprises after the contract is signed. Start with your facility's risk profile A maintenance company can only price and plan accurately if it understands what failure means for your operation. In a retail office, a comfort cooling issue may trigger tenant complaints. In a restaurant, the same cooling problem can overload kitchen ventilation and refrigeration systems. In a cold storage facility, a mechanical or electrical failure can threaten inventory within hours. Before comparing proposals, build a simple equipment and risk profile. Include the age, brand, model and location of major equipment, along with any recurring issues. Rooftop units, split systems, make-up air units, exhaust fans, boilers, chillers, walk-in coolers, ice machines and control systems should all be documented if they are part of the contractor's scope. If you are not sure where your current system stands, a structured review like this guide to evaluating a commercial HVAC system can help you separate normal wear from signs that your maintenance program is falling behind. Compare scope, not just visit frequency Many proposals look similar at first glance: two visits per year, quarterly inspections or seasonal tune-ups. The real difference is what happens during those visits. One company may perform a quick visual inspection and filter change, while another checks electrical connections, drain lines, coils, belts, bearings, controls, economizers and temperature split readings. ASHRAE publishes Standard 180, a recognized maintenance standard for commercial HVAC systems. You do not need to memorize it, but it gives facility managers a useful principle: preventive maintenance should be equipment-specific, documented and tied to actual inspection tasks rather than vague promises. A proposal should make clear which systems are covered, what tasks are included and what is excluded. If it uses broad language like "inspect HVAC equipment" without a checklist, ask for detail before signing.
August 31, 2026
 A leaking walk-in cooler, a tripped panel, and a failed rooftop unit rarely fail in the same week. But when a facility manager needs three vendors for three trades, downtime stacks up fast. Commercial facility maintenance solves that: one licensed contractor across multiple trades who already knows the building. Virginia's commercial market has plenty of single-trade HVAC shops. Some also dabble in refrigeration or electrical work. Far fewer are staffed to run a full facility maintenance program under one contract. That means HVAC, refrigeration, electrical, kitchen equipment, and boilers, all from one vendor. This guide covers the five best commercial facility maintenance companies in Virginia. We evaluated each on trade coverage, contractor licensing, service area, and what happens when equipment fails at 2 a.m. Virginia's Top 5 Facility Maintenance Companies at a Glance VA Commercial Repair Solutions runs a full facility maintenance program for commercial clients across the Shenandoah Valley and central Virginia. That means HVAC, refrigeration, kitchen equipment, electrical, and boilers, backed by 24/7 live-person answering. Southern Air is a 100% employee-owned MEP contractor operating statewide since 1946, with thousands of buildings under active maintenance contracts. James River Air has covered Richmond-area facilities since 1967 across HVAC, plumbing, and electrical. Elite Service & Enterprises handles six trades for Hampton Roads clients under one Class A license. Oasis Heating, A/C & Refrigeration pairs HVAC with commercial refrigeration for Northern Virginia businesses since 1998.
August 31, 2026
A commercial HVAC installation should never start with a tonnage guess or a rush order for the same unit that was already on the roof. The right system has to match the way your building is used, how many people occupy it, what equipment generates heat, how much ventilation is required, and how easily your team can maintain it after installation. For facility managers, restaurant operators, school administrators, franchise owners, and food processing managers, a poorly planned installation can create years of avoidable problems. Oversized equipment can short cycle, miss humidity targets, and waste energy. Undersized equipment can run nonstop, fail early, and still leave employees and customers uncomfortable.  The best plan balances comfort, code compliance, uptime, maintenance access, and long-term operating cost. Below is a practical planning framework for a commercial HVAC installation that fits your actual facility, not a generic square-footage estimate. Start With the Facility, Not the Equipment Before choosing a rooftop unit, split system, ductless heat pump, or any other option, document what the building needs to do every day. A retail store, commercial kitchen, medical office, brewery taproom, church, warehouse, and cold storage support space can all have similar square footage but completely different heating, cooling, humidity, ventilation, and electrical requirements. Start by gathering the information a qualified contractor will need to design around reality. This includes floor plans, ceiling heights, insulation details, window exposure, occupancy schedules, equipment lists, cooking appliances, exhaust fans, walk-in cooler locations, server or electrical rooms, and any future expansion plans. If your business has seasonal peaks, such as wineries, event venues, hotels, or school facilities, those operating patterns matter too. If you are replacing an existing system, do not assume the old design was correct. Review comfort complaints, repair history, energy bills, humidity problems, hot or cold zones, and any areas that were never served properly. For a deeper pre-replacement review, this guide on how to evaluate a commercial HVAC system can help you organize the questions before talking with a contractor. Use Load Calculations Instead of Rules of Thumb A commercial HVAC installation should be sized through a proper load calculation. Rules of thumb can be useful for early budgeting, but they are not reliable enough for final equipment selection. A real load calculation accounts for building envelope, roof exposure, insulation, windows, occupancy, ventilation air, lighting, appliances, humidity, and internal heat sources. This is especially important in restaurants, breweries, food service spaces, and light industrial facilities. Ovens, fryers, dish machines, compressors, motors, packaging equipment, refrigeration systems, and exhaust hoods can all change the cooling and makeup air requirements. A space that looks simple on paper may have major heat loads during lunch rush, production runs, or evening events. Sizing affects more than comfort. It influences duct size, electrical service, gas piping, condensate drainage, equipment staging, noise, humidity control, filter life, and serviceability. A system that is too large may satisfy the thermostat quickly without removing enough moisture. A system that is too small may run continuously and still fail to hold setpoint during peak conditions.
August 26, 2026
 Choosing a commercial HVAC contractor is not just a purchasing decision. It affects employee comfort, tenant satisfaction, customer experience, production uptime, food safety, energy costs, and how quickly your facility recovers when equipment fails. For facility managers, restaurant owners, property managers, and industrial operators, the best contractor is rarely the cheapest name on the first proposal. A strong partner understands commercial systems, responds when the building is under stress, documents their work, and helps you prevent repeat failures instead of only reacting to emergencies. Use this guide to compare commercial HVAC contractors with a practical, facility-focused lens before you sign a service agreement or authorize a major repair. Start With Your Facility’s Actual HVAC Risk Before calling contractors, define what failure really costs your operation. A retail store may be able to tolerate a short comfort issue during mild weather. A restaurant, medical office, server room, production area, brewery, or multi-tenant property may not. Write down the basics of your facility before requesting quotes: Equipment types, including rooftop units, split systems, boilers, chillers, heat pumps, exhaust fans, make-up air units, and controls Business hours, after-hours needs, and peak occupancy periods Areas that are mission-critical, such as kitchens, cold storage, computer rooms, production spaces, or customer-facing zones Known recurring problems, including short cycling, poor airflow, frozen coils, hot and cold spots, nuisance alarms, or high utility bills Access considerations, such as roof access, locked mechanical rooms, tenant coordination, or restricted work hours Documentation you already have, including maintenance logs, model numbers, warranties, and past service invoices This information helps you evaluate whether a contractor is asking the right questions. A serious commercial HVAC contractor will want to understand your building, not just quote a generic hourly rate. Confirm True Commercial HVAC Experience Residential HVAC experience does not automatically translate to commercial facility work. Commercial systems are often larger, more complex, more tightly connected to business operations, and subject to different code, access, safety, and scheduling requirements. Ask whether the contractor regularly works on facilities similar to yours. A restaurant has different needs than a warehouse. A medical office has different priorities than a vineyard, retail center, apartment community, or manufacturing space.
August 26, 2026
 Virginia summers push AC systems past their limits. Humidity climbs, compressors run nonstop, and the units that skip maintenance are the ones that quit in July. Not every company that shows up in an "AC repair near me" search actually fits your building. Some are built for homeowners, others for office parks, restaurants, and industrial facilities. Picking the wrong type wastes a service call and delays the fix. This guide covers seven AC repair companies operating across Virginia. We checked license class, service area, commercial capability, and published pricing. Match the company to the job before you dial. Geography matters just as much as trade focus. A Charlottesville-based company won't dispatch to Norfolk, and a Northern Virginia franchise may not reach the Shenandoah Valley. Confirm coverage before you assume any company on this list can reach your address. At a Glance: Virginia's Top AC Repair Companies VA Commercial Repair Solutions covers the Shenandoah Valley and central Virginia as a commercial-only specialist with 24/7 live-person answering. ColonialWebb is a Richmond-based mechanical and electrical contractor with locations spanning the state. Service Experts operates commercial and residential branches in Fairfax, Richmond, and Roanoke under a national network. Michael & Son Services brings statewide home-service coverage from Alexandria to Norfolk, backed by NATE-certified technicians. One Source Mechanical serves Charlottesville with a rare residential-and-small-commercial model. Comfort Source and W.E. Brown round out the list as two long-standing Charlottesville-area companies built specifically for homeowners.
August 26, 2026
 A commercial HVAC installation is not a bigger version of a residential one. Different codes, different equipment classes, and different failure costs all apply. Get any of that wrong, and you're paying for it for the next 15 to 20 years. This guide walks through the full commercial installation process, start to finish. Some steps are technical enough that only a licensed contractor should handle them. Others are decisions only you, the property owner or facility manager, can make. The stakes are real. An undersized rooftop unit runs constantly and still can't keep a kitchen or a sales floor comfortable in August. An oversized one short-cycles, wastes energy, and wears out early. Step 1: Start With a Proper Load Calculation Every commercial installation should start with a load calculation, not a nameplate match. Too many contractors simply replace old equipment with the same tonnage, even if the original system was never sized correctly. That approach carries forward every past mistake into your new system. Commercial load calculations use ACCA Manual N , the industry standard for non-residential buildings. It accounts for factors a residential Manual J calculation ignores entirely. Kitchen equipment heat output, occupancy density, exhaust hood make-up air, and window orientation all change the number. A restaurant kitchen with heavy cooking equipment needs far more cooling capacity per square foot than an office. A vineyard tasting room with a wall of south-facing windows carries a different load than a warehouse with none. The calculation has to reflect the building you actually have — not a rule of thumb. Step 2: Choose the Right Equipment Type for the Building Commercial buildings use several distinct equipment types. The right choice depends on the building, not on personal preference or what was easiest last time. Rooftop units (RTUs): The standard choice for retail, restaurant, and office buildings with flat roofs. All the major components live in one weatherproof cabinet on the roof, out of the way of usable floor space. Installation requires structural rooftop calculations and, on multi-story buildings, crane rigging. Split and central systems: These separate the outdoor condenser from an indoor air handler, connected by refrigerant lines and ductwork. They work well in smaller commercial spaces that already have ductwork in place. Retrofitting ductwork into a building that never had it adds significant cost. Mini-split and ductless heat pumps: These mount a wall unit indoors, linked to an outdoor compressor with no ductwork. They suit additions, retrofits, or buildings with exposed structural ceilings. Multiple indoor heads can run off one outdoor unit, giving each zone independent control. PTACs: These are the through-the-wall units you'll recognize from hotel rooms and small commercial spaces. Each unit heats and cools its own room independently, with no shared ductwork or central plant. That makes them the standard choice for hospitality properties where every room needs its own control. Geothermal systems: These trade a conventional outdoor condenser for buried ground loops that exchange heat with the earth. They cost more upfront but deliver lower operating costs over the system's life. For large facilities planning long-term ownership, the payback period can make sense. Whatever equipment type fits your building, ask about the brand's local service network before you commit. A system from a major brand — Carrier, Trane, Lennox, Bryant — is easier to service quickly if parts fail. A no-name brand with no local distributor relationship can turn a simple part swap into a weeks-long wait. Step 3: Understand Today's Refrigerant Rules Refrigerant rules changed significantly under the AIM Act , and installation is where those rules matter most. The EPA is phasing down high-GWP refrigerants like R-410A in favor of lower-GWP alternatives. New commercial equipment increasingly ships pre-charged with these newer refrigerants instead. Ask any installer directly which refrigerant a proposed system uses and why. Newer low-GWP refrigerants like R-454B are mildly flammable, a class the industry labels A2L, which changes handling and service-line design. A technician unfamiliar with A2L equipment is a liability on your rooftop, not just an inconvenience. Whoever installs your system must hold EPA Section 608 certification to legally handle refrigerant. That's federal law, not a nice-to-have credential. Ask for the technician's certification number before the first fitting gets connected. Step 4: Verify Licensing and Permits Before Anyone Touches the Roof Virginia licenses contractors in three classes, and the class matters for a commercial project. Class A licenses cover projects of unlimited value; Class B caps at $120,000, Class C at $10,000. Most commercial HVAC installations exceed the Class B ceiling, so confirm Class A before signing anything. Virginia also created a new Residential HVAC Mechanic license in 2025 with lighter training requirements. That license explicitly prohibits commercial work — it exists as a stepping stone toward full journeyman status. A contractor holding only this credential cannot legally install your system, regardless of experience. Verify any contractor's license and specialty codes directly through Virginia's license lookup before work begins. Confirm the HVAC or mechanical specialty is listed, not just a general contractor designation. Then pull the local mechanical permit — most jurisdictions require inspection at rough-in and again at final startup. Government and institutional projects add another layer: bidding eligibility. Facilities working with state or municipal contracts should confirm their contractor holds S.W.A.M. and eVA certification. Without it, an otherwise qualified contractor may be unable to bid the job at all. Insurance matters just as much as licensing. Ask for a certificate of general liability insurance and proof of workers' compensation coverage before the crew arrives. If a technician is injured on your property without workers' comp, you could be held liable. Step 5: Schedule Installation Around Your Operating Hours Installation timing affects your business as much as the technical details do. A restaurant, retail store, or hotel can't simply close for a week while equipment gets swapped. Ask your contractor whether major work can happen after hours, overnight, or in phases. RTU replacements often happen with the old unit running until the new one is set and ready to connect. That staging minimizes the actual downtime window to hours, not days. For multi-zone buildings, phasing zone by zone keeps at least part of the facility comfortable throughout. Confirm the installation date against your business calendar, not just the contractor's. A restaurant scheduling major HVAC work the week before a health inspection is taking on unnecessary risk. Build in a buffer for delays from permitting, weather, or backordered parts. Step 6: Plan the Ductwork and Airflow Design Before Equipment Arrives Ductwork design is where many installations go wrong — not the equipment itself. Undersized or poorly routed ductwork can cripple even a perfectly sized, top-tier unit. Airflow has to match the equipment's rated capacity, or you lose efficiency before the system runs a full season. Kitchens complicate duct design further. Type 1 hoods handle grease-producing equipment; Type 2 hoods handle steam and heat only. Both exhaust large volumes of air, which must be replaced with make-up air. Skip that make-up air, and the kitchen runs at negative pressure. Doors stick, exterior doors won't close properly, and the exhaust fan fights unbalanced pressure. A ductwork plan that accounts for hood volumes from the start avoids this entirely. Ask whether your contractor fabricates ductwork in-house or subcontracts it out. In-house fabrication means faster turnaround and one point of accountability if a run doesn't fit. After installation, insist on airflow balancing — measured, not estimated — before signing off on the job. Step 7: Budget for the Full Installation, Not Just the Equipment Commercial HVAC pricing rarely means one number for one box on the roof. The unit itself is often the smallest line item once everything else is added up. Ductwork, electrical or gas hookups, structural work, and controls all add to the total. Older buildings frequently need an electrical service upgrade to support new equipment, especially 3-phase power for larger units. Rooftop installations on multi-story buildings often require crane rigging, which adds a scheduled, weather-dependent step to the project. None of these costs show up if you only ask for "the price of a new unit." A written estimate should itemize equipment, ductwork, electrical or mechanical work, permits, and disposal of the old system separately. That itemization is what lets you compare quotes from different contractors fairly. A number with no breakdown is a number you can't evaluate. Since commercial pricing varies so much by building, VA Commercial Repair Solutions doesn't publish flat rates online. It quotes installation work for free after walking the site — the right model for pricing this variable. A flat online number for a category like this is usually a lowball designed to get you on the phone. Step 8: Confirm What's Bundled — Controls, Warranty, and Registration Ask exactly what's included in the installed price beyond the equipment itself. A WiFi thermostat and an in-duct air purifier add real value when they're bundled in, not upsold later. Confirm whether labor to install those add-ons is separate or already covered. Labor warranty length is a real differentiator between contractors. A full year of free labor on a new installation protects you from callback fees. That matters if something needs adjustment in the first few months of operation. Equipment manufacturer warranties are separate from labor warranties, and they usually require registration within a set window after installation. A good contractor registers that paperwork on your behalf, as part of the job. Ask who's responsible for filing it, and get confirmation once it's done. Step 9: Commission the System Before You Sign Off Installation isn't finished when the equipment turns on — it's finished when it's verified to work correctly. Commissioning means the technician measures actual airflow, refrigerant charge, and temperature split against the design numbers. Insist on this step, in writing, before final payment. Ask for a written startup report: refrigerant pressures, temperature readings at supply and return, and airflow measurements by zone. That report becomes your baseline for every future service call. Without it, a technician five years from now is diagnosing blind. Schedule the final building inspection only after commissioning is complete, not before. An inspector checking an unbalanced, improperly started system can miss problems that surface under real load. Get commissioning data in hand, then call for inspection. Installation Considerations for Specialized Facilities Standard installation steps apply everywhere. But certain facility types carry extra requirements that are easy to miss until the system is already running. Plan for these before equipment arrives, not after the first service call. Restaurants and commercial kitchens: New HVAC has to coordinate with the exhaust hood and fire suppression systems already in place. A new AC or RTU installed without accounting for hood exhaust volume will fight a losing battle against negative pressure. Time the installation around health inspection dates — a kitchen without functioning climate control can fail an inspection outright. Microbreweries and vineyards: These add process cooling on top of comfort cooling. Brite tanks, fermenters, and glycol chilling systems generate and require heat loads a standard load calculation doesn't anticipate. A contractor without brewing-specific equipment experience may size comfort cooling correctly while missing the process loads entirely. Agricultural and food processing facilities: Poultry plants, dairies, and cold-storage facilities need HVAC coordinated tightly with electrical and refrigeration work. These facilities often run 3-phase power for heavy machinery alongside industrial refrigeration for perishable inventory. A single contractor licensed across electrical, HVAC, and refrigeration removes the guesswork of coordinating three separate vendors on one job. Hospitality properties: Hotels and motels installing or replacing PTAC units need a plan that minimizes room downtime. Because each PTAC serves one room, installation can often be phased a few rooms per day, without closing the property. That phasing matters more to a hotel's revenue than almost any other scheduling decision in this guide. Common Questions About Commercial HVAC Installation How long does a commercial HVAC installation take? Timeline depends heavily on scope. A straightforward RTU swap on an existing curb can take one to three days. A full system replacement with ductwork and electrical changes can take several weeks, especially with permitting or crane-rigging delays. Do I need a commercial-specific contractor, or will any licensed HVAC company do? Not every licensed HVAC contractor is equipped for commercial work. Virginia's newer Residential HVAC Mechanic license explicitly excludes commercial installations, and even a Journeyman license doesn't guarantee commercial experience. Ask specifically about commercial project history, not just license status. How do I know if I should repair my current system instead of installing a new one? If a repair costs 50% or more of replacement value on a system over 10 years old, installation wins financially. An older system with repeated failures often costs more in emergency repairs than a planned installation would. A contractor should show you both numbers before you decide. Should I add smart controls while I'm already installing new equipment? Installation is the easiest time to add smart controls — the labor is already scheduled. A WiFi thermostat and zone controls let you monitor and adjust temperature remotely across multiple properties. Ask whether your installer bundles these at cost, since retrofitting them later usually costs more in separate labor. Can I install new equipment while keeping my existing ductwork? Often, yes — if the ductwork is sized correctly and in good condition. Reusing sound ductwork saves real installation cost and time, but it has to be evaluated first, not assumed compatible. New equipment moves different airflow than old equipment did, and duct sizing has to match. Are there rebates or incentives for installing energy-efficient commercial HVAC in Virginia? Utility rebate programs for high-efficiency commercial equipment exist and change frequently by provider. Some federal tax provisions may also apply to qualifying installations — ask your contractor what's currently available. Confirm any tax-related details with a qualified tax professional before relying on a specific number. What happens to the old equipment and refrigerant during installation? Old refrigerant has to be recovered, not vented — that's federal law under EPA Section 608 . A licensed technician evacuates it into a recovery cylinder for reclamation or proper disposal. Ask your contractor how they handle disposal of the old unit itself, not just the refrigerant. Does a new installation come with any maintenance built in? Many commercial contractors bundle free scheduled preventive maintenance into a new installation for the first year. That visit catches early adjustment issues before they become service calls. Ask whether that's included, and get the schedule in writing. Conclusion: Installation Done Right, Once A commercial HVAC installation done right should need minimal attention for the next decade or more. Get the load calculation right, choose suitable equipment, verify licensing, and commission the system properly. Skip any one of those steps, and you inherit someone else's mistake for the life of the equipment. VA Commercial Repair Solutions has installed commercial HVAC, refrigeration, and kitchen equipment systems across central Virginia for over 17 years. Every installation includes a free estimate, a full year of free labor, and warranty registration handled on your behalf. Class A licensed, S.W.A.M. and eVA certified, and reachable by a live person 24/7 — never voicemail. Request a free installation quote and get the load calculation started.
August 14, 2026
 Commercial electrical problems don't schedule themselves. A failed panel, a tripped breaker, or a code violation flagged during inspection all demand action. Getting the right contractor on-site — fast — makes the difference. Virginia's commercial electrical market runs from federal contractors in Northern Virginia to food processors in the Shenandoah Valley. A company that dominates Hampton Roads isn't dispatching to Roanoke. Geographic fit matters as much as licensing tier. This guide covers the six best commercial electricians in Virginia for 2026. Each was evaluated on license class, geographic coverage, trade depth, credentials, and how they actually serve commercial and industrial clients. Virginia's Best Commercial Electricians at a Glance VA Commercial Repair Solutions covers central Virginia and the Shenandoah Valley with Class A electrical and mechanical licenses. Live-person staffing is available 24/7 — no voicemail. Harris Electric Co. of VA has served Richmond's commercial market since 1960, now in its third generation of family ownership. Blackout Electric brings Class A credentials and a military-veteran-owned model to Hampton Roads. Their documented portfolio includes government and institutional projects across the region. Hitt Electric Corp. has served Virginia Beach schools, hospitals, and federal facilities for over 50 years. Hopkins | Lacy covers Roanoke and Charlottesville with employee-owned MEP design-build depth dating to 1922. Kolb Electric has operated since 1925 in Northern Virginia and the DC metro. They maintain the largest bucket truck fleet in the region.
August 14, 2026
Your furnace quits on the coldest morning of the year. Employees are freezing, customers notice immediately, and every hour without heat costs real money. Most business owners do the same thing: type "furnace repair near me" and call whoever ranks first. Speed without vetting can land you with an unqualified technician and a furnace that breaks again in weeks. This guide walks through every step — from spotting warning signs early to hiring a contractor you can trust. Finding reliable commercial furnace repair quickly is not about luck. It is about knowing what to look for before you make the first call. Follow these steps and you will move faster and smarter than most. Step 1: Recognize the Warning Signs Before the Breakdown The best time to find a furnace repair company is before the emergency arrives. These warning signs give you a window to act on your own terms. Miss them, and you are making frantic calls with no leverage and no heat. Strange noises are the first signal most technicians flag. Banging on startup means delayed ignition — a gas buildup that fires late. Grinding or squealing points to failing motor bearings or a worn belt. A yellow or orange pilot flame is a stop-everything warning. A healthy commercial furnace burns blue. Yellow or orange signals incomplete combustion — evacuate and call a technician immediately. Short cycling — when the furnace starts, runs briefly, then shuts off — kills components fast. Rising energy bills without an obvious cause tell the same story. Uneven temperatures across building zones suggest a blower or ductwork problem. According to furnace repair warning signs , catching a bad ignitor early is a $150–$500 repair. Letting the problem damage the heat exchanger pushes that figure past $1,500. The difference between those outcomes is catching the warning before it cascades. Gas or burning smells require immediate action. A gas odor means evacuate first, then call. A persistent burning smell from the vents suggests overheating components — shut the system down and do not restart it. Not every warning sign is an emergency. Banging noises and gas smells are immediate calls. Uneven heat or rising bills can typically wait for next-day service — but do not let them sit a week. Delayed action on secondary symptoms is where most avoidable breakdowns originate. Step 2: Search With Precision, Not Just Speed "Furnace repair near me" returns a mix of residential and commercial results. That is a problem. A technician who primarily services homes is not always equipped or licensed to handle commercial heating equipment. Search specifically: "commercial furnace repair [your city]." In central Virginia, that means adding Charlottesville, Harrisonburg, Staunton, or Waynesboro to the query. Local specificity matters — contractors serving the Shenandoah Valley understand the climate demands and building types in the region. Pay attention to what a company leads with on its website. A contractor whose homepage says "keeping homes comfortable" serves homeowners. You need one whose site talks about commercial facilities and industrial buildings — a completely different scope. Also check these secondary sources before calling: Google Business Profile reviews — look for reviewers who are businesses, not homeowners BBB business search for complaint history and current rating Angi and similar directories, filtered to commercial specialization Review scans reveal whether a contractor works commercial systems regularly or treats them as an add-on. Look for patterns, not outliers — one bad review in five years differs from recurring complaints about upselling. That distinction matters before the first phone call. Step 3: Verify Credentials Before You Book This step takes five minutes and protects you from serious risk. In Virginia, all mechanical contractors must hold a license from the Department of Professional and Occupational Regulation. Verify any contractor at the Virginia DPOR license lookup — a free, real-time public database. Here is what to look for in the record: License class. Virginia issues Class A, B, and C contractor licenses. Class A is unlimited in project value; Class B caps at $120,000; Class C at $10,000. For commercial furnace work, verify Class A. Specialty codes. A general contractor license does not automatically authorize HVAC or mechanical work. Confirm the license includes the HVAC or mechanical specialty designation. Per the Virginia contractor license guide , a general license without the right specialty code is incomplete coverage. Entity match. The name on the license must exactly match the name on the invoice. A sole proprietor license does not cover work done under an LLC. This mismatch creates liability exposure on your end. Insurance. Ask for a certificate of liability insurance and proof of workers' compensation coverage. If a technician is injured on-site without workers' comp, you could be liable. Get both documents in hand before work begins. An A+ BBB rating is a useful secondary signal. DPOR verification, however, is non-negotiable — no exceptions. Step 4: Ask These Questions Before Booking A short phone call tells you most of what you need to know. Per questions to ask first, the best screening happens before the technician arrives. Work through these before you commit. "Are you licensed for commercial mechanical work in Virginia?" Push for the DPOR license number. Verify it yourself — the lookup takes two minutes and confirms whether the answer is real. "Is there a service call fee?" Reputable commercial contractors often waive the fee when a repair is performed. Know this upfront. A separate call fee on top of labor is a different pricing model — ask about it before you book. "Can I get a written estimate before you start?" This is not negotiable. Any contractor unwilling to put a price in writing before touching your equipment is one to avoid. Written quotes protect both parties from scope disputes. "Are your technicians paid on commission?" Commission-based technicians have a financial incentive to upsell replacement over repair. Technicians paid hourly or on salary have no such pressure. Ask directly — the answer tells you a great deal. "What is your repair-before-replacement policy?" A contractor who leads with replacement on every call is not serving your interests. A reliable contractor shows evidence — meter readings, gauge pressures, component tests — before recommending a new system. "Do you answer calls 24/7, or does voicemail pick up after hours?" Furnaces do not break on a schedule. A contractor rolling calls to voicemail after 6 PM is not a viable partner for commercial facilities. A live manager answering at midnight in January is a fundamentally different service. Step 5: Know the Green Flags — and the Red Ones Speed is not reliability. The lowest bid is not the best value. Here is how to quickly sort contractors worth hiring from those worth skipping. Green flags 24/7 live answering with no voicemail. This is the single most important operational differentiator for commercial clients. When heating fails during a January cold snap, voicemail is not an answer. That kind of policy — a manager or owner, not a call center — is built for businesses, not homeowners. Repair-before-replace as a written, guaranteed policy. This phrase in writing, backed by a dollar guarantee, signals an ethical commitment. The companies worth hiring commit to showing evidence before recommending replacement — they do not just claim they will. Background-checked, drug-tested technicians. Commercial facilities have access requirements that differ from residential homes. A contractor that screens its team provides a baseline of accountability that matters. Ask for documentation — not just a verbal assurance that screening is done. In-house capabilities. Contractors who fabricate ductwork in-house, carry parts on service trucks, and cover multiple trades resolve problems faster. Subcontracting each component adds delay at every handoff. A contractor who cannot control the timeline cannot own the outcome. Preferred-service relationships with major brands. Authorized service technicians for Carrier, Trane, Lennox, Goodman, and similar manufacturers know these systems at a deeper level. Parts sourcing is faster and first-visit fix rates are higher. Red flags Voicemail after hours. Period. For a commercial client, this is a deal-breaker. No after-hours answer means no help when the equipment fails on a Saturday night before your busiest week. No written quote before work begins. This enables invoice expansion after the job is done. If they resist, that tells you how disputes will be handled later. Pressure to replace without showing evidence. If the technician declares the system dead without a meter test, ask to see the reading. If they cannot produce it, walk away. A component-level diagnosis is not optional — it is the job. No verifiable DPOR license. If the lookup returns nothing for the name or license number, stop. Unlicensed contractors carry no bond and no oversight — disputes end in small claims court, not a license board. Reluctance to answer direct questions. A contractor who hedges on licensing, insurance, or fee structure is not being vague by accident. That pattern of evasion tells you how the rest of the job will go. Step 6: Get the Estimate in Writing Before any technician touches your equipment, get a written estimate itemizing parts, labor, and additional charges. This protects you from invoices that grow after the fact. Verbal agreements leave room for dispute; written estimates do not. A written estimate also creates a baseline when comparing quotes from more than one contractor. Bring quotes from two or three providers before authorizing work on any major repair. The difference in pricing can be significant — and revealing. A proper written estimate covers the scope of work, the parts to be replaced, and the labor rate. It should also state whether the quoted price is flat-rate or subject to revision if diagnostics reveal additional problems. Get this before the first wrench turns. Ask about the warranty on both parts and labor. Reputable commercial contractors typically offer 90 days on labor and a manufacturer warranty pass-through on parts. Any contractor unwilling to stand behind the work is signaling something about how they operate. No warranty offered on the repair is a red flag — full stop. Get the warranty terms in writing alongside the estimate. That document matters if a part fails two months after the repair. Step 7: Apply the Repair vs. Replace Decision Carefully Before authorizing any significant repair, know where your furnace sits on the lifespan curve. The repair vs. replacement guide outlines the standard industry threshold. If repairs hit 50% or more of replacement cost on a 15-year-old furnace, replace it. Commercial furnaces generally last 15–25 years with proper maintenance. A unit inside that window with a clean service record is almost always worth repairing. A unit past 20 years with repeated failures likely costs more in emergency calls than a new system would. The average furnace repair cost runs $64–$1,475 depending on the component, with a national average around $318. A failing blower motor runs $150–$2,000; a heat exchanger can exceed $1,500. Those numbers compared against your system's age and service history tell the real story. Your contractor should walk through this analysis before recommending replacement. If they skip straight to "you need a new system," push back and ask for the component-level evidence. A trustworthy technician shows the failing part, the meter reading, or the test result — not just a quote. Step 8: Prevent the Next Emergency With a Maintenance Plan Finding reliable furnace repair quickly solves today's problem. Preventing the breakdown in the first place solves the bigger one. A scheduled maintenance plan is how commercial facilities stay ahead of both. Commercial systems should be professionally serviced at least twice a year — once before heating season, once before cooling. Per the commercial HVAC maintenance guide , this schedule cuts unexpected breakdowns and keeps the manufacturer warranty valid. Skipping visits often voids that coverage. A quality plan covers: Filter inspections Refrigerant pressure checks Coil cleaning Sensor calibration Electrical inspections Motor lubrication Some plans also include equipment warranty registration on your behalf. When a covered component fails, the contractor handles the claim. Look for a plan with a fixed service schedule. The best plans treat the contractor like a facility partner, not a break-fix vendor. Expect a written service record after each visit and a consistent technician who knows your equipment by name. Preventive maintenance builds a documented service history. When a technician recommends replacement, that record shows whether the advice fits the equipment's wear pattern. Documentation protects you from convenience-driven suggestions — and gives you a position when comparing contractor opinions. Frequently Asked Questions What information should I have ready before calling a furnace repair company? Have the furnace's make, model, and serial number ready — typically on a label inside the cabinet door. Note when the problem started, what sounds or smells you observed, and whether any heat is reaching the building. The more specific you can be, the faster the technician can pre-load the right parts before arriving on-site. Is same-day commercial furnace repair realistic? Yes — for most common failures, it is. Most repairs take two to four hours when the technician carries the right parts. A contractor with live answering can dispatch same-day, even on weekends, unless the repair requires a special-order part. Same-day service is a reasonable expectation — ask any contractor about their typical dispatch window. How much does commercial furnace repair typically cost? It varies by component and system size. Common repairs range from $64 to $1,475, with a national average around $318. A failing blower motor runs $150–$2,000; a cracked heat exchanger can exceed $1,500. Commercial systems often sit at the higher end of these ranges given equipment scale and labor access. What is the 50% rule for deciding between repair and replacement? The 50% rule is the standard industry benchmark. If a repair runs 50% or more of a new unit's cost on a 15-year-old furnace, replacement typically wins. Service history matters too — one major repair on a well-maintained system differs from a pattern of recurring failures. What is the difference between a furnace tune-up and a repair? A tune-up is preventive: a technician inspects, cleans, and calibrates the system before a failure develops. A repair addresses an existing fault that has already occurred. Annual tune-ups catch deteriorating components before they become emergency calls mid-winter — when options are fewest. Conclusion: The Fast Path to the Right Contractor Finding reliable furnace repair near you quickly is a process, not a lottery. Know the warning signs, search commercial-specific contractors, and verify licenses through Virginia's DPOR system before you book. Ask the right questions on the first call and get everything in writing. The contractor you want holds a Class A license and answers the phone at midnight. They show evidence before recommending any replacement. Their technicians work on salary — not commission — so the recommendation reflects your equipment's condition, not a sales target. For commercial and industrial facilities across central Virginia and the Shenandoah Valley, VA Commercial Repair Solutions brings 50+ combined years of experience, 24/7/365 live-person answering with no voicemail, and a repair-before-replace guarantee — including $50 cash and a $500 equipment credit if they cannot fix the problem. Contact them directly or visit the website to request service from a live technician today.
August 14, 2026
Falls remain the leading cause of fatalities in construction and building maintenance. A commercial rooftop without a properly installed safety ladder isn't a shortcut — it's a liability. The OSHA citations, workers' compensation claims, and litigation that follow a fall event dwarf the cost of a compliant installation. Virginia's commercial building stock spans office parks, restaurant buildings, hotel properties, warehouses, and food processing facilities. Most of those buildings have rooftop HVAC units that require regular service access. Every visit without a permanent, OSHA-compliant fixed ladder is a documented risk. It compounds with every maintenance cycle. Most general contractors aren't equipped to design, fabricate, and certify a compliant fixed ladder system. OSHA 29 CFR 1910.23 sets specific dimensional, material, and fall protection requirements. This guide covers the Virginia companies actually qualified to do this work correctly. Which Virginia Companies Install Safety Ladders Best? VA Commercial Repair Solutions covers central Virginia and the Shenandoah Valley with in-house custom ladder fabrication under a Virginia Class A mechanical license. Diversified Fall Protection is the largest turnkey fall protection integrator in the United States. They have a dedicated Virginia territory manager and a patented access ladder series. EDGE Fall Protection designs and installs OSHA-compliant systems nationwide. Their specific expertise is rooftop HVAC equipment fall protection for commercial and institutional facilities. Valcourt Group operates out of Richmond and Virginia Beach with a full fixed and ship ladder service line. All systems are backed by a 5-year warranty with PE-certified anchor testing.