
Best Companies in Virginia for Safety Ladder Installation
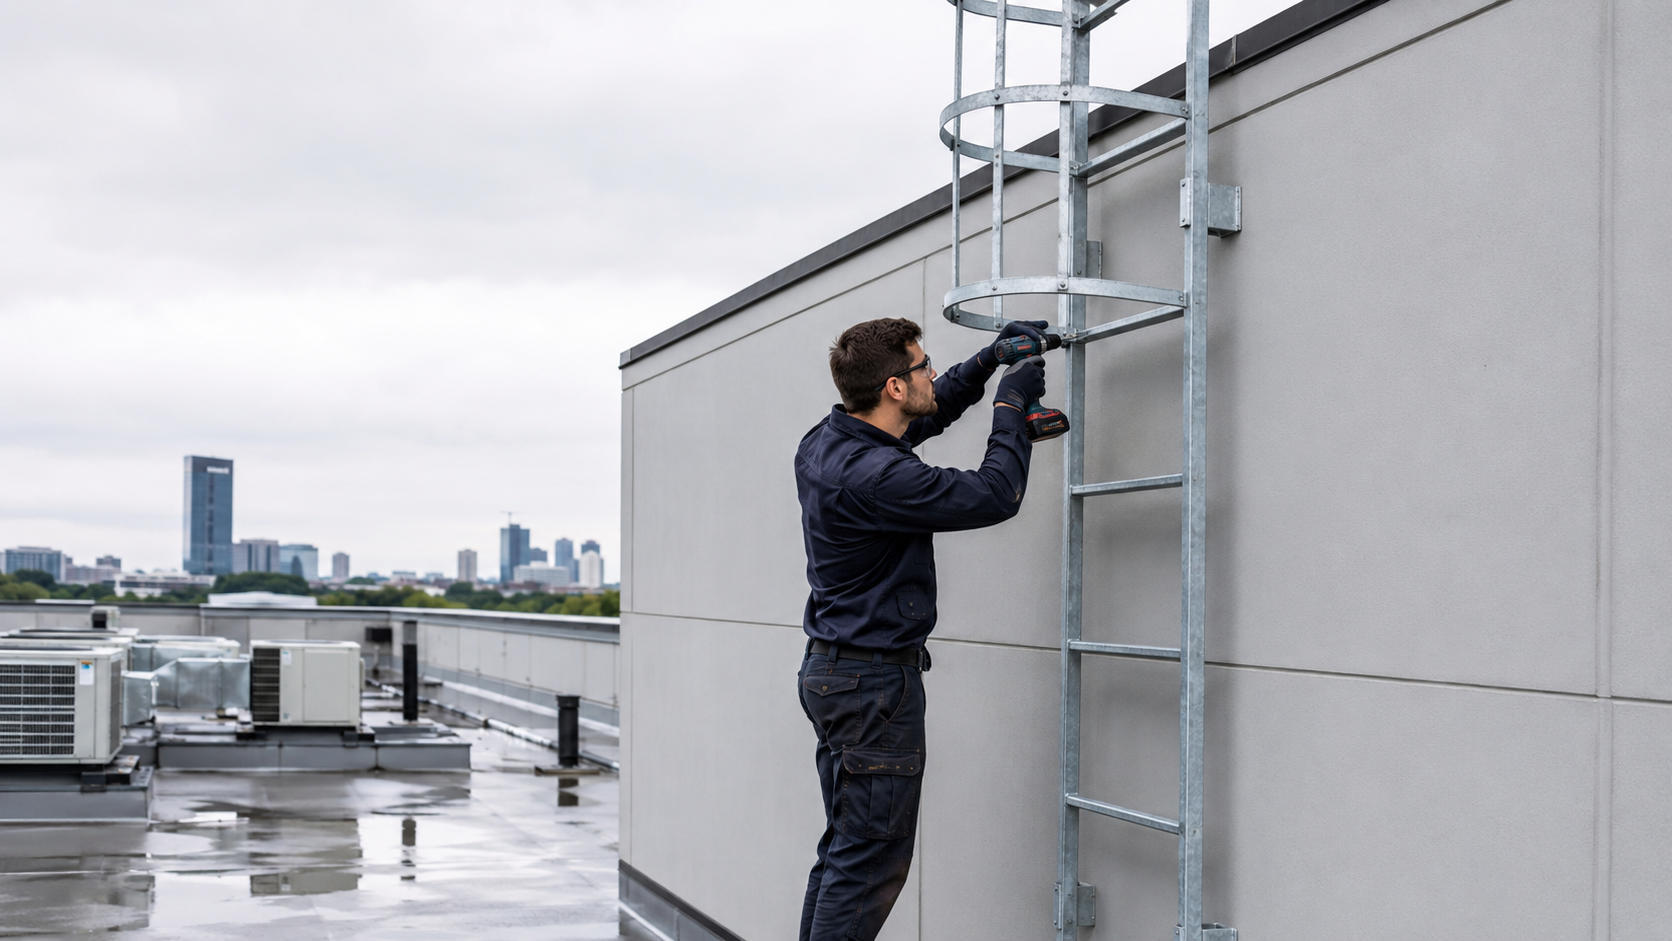

Falls remain the leading cause of fatalities in construction and building maintenance. A commercial rooftop without a properly installed safety ladder isn't a shortcut — it's a liability. The OSHA citations, workers' compensation claims, and litigation that follow a fall event dwarf the cost of a compliant installation.


Virginia's commercial building stock spans office parks, restaurant buildings, hotel properties, warehouses, and food processing facilities. Most of those buildings have rooftop HVAC units that require regular service access. Every visit without a permanent, OSHA-compliant fixed ladder is a documented risk. It compounds with every maintenance cycle.


Most general contractors aren't equipped to design, fabricate, and certify a compliant fixed ladder system. OSHA 29 CFR 1910.23 sets specific dimensional, material, and fall protection requirements.

This guide covers the Virginia companies actually qualified to do this work correctly.


Which Virginia Companies Install Safety Ladders Best?


VA Commercial Repair Solutions covers central Virginia and the Shenandoah Valley with in-house custom ladder fabrication under a Virginia Class A mechanical license. Diversified Fall Protection is the largest turnkey fall protection integrator in the United States. They have a dedicated Virginia territory manager and a patented access ladder series.


EDGE Fall Protection designs and installs OSHA-compliant systems nationwide. Their specific expertise is rooftop HVAC equipment fall protection for commercial and institutional facilities. Valcourt Group operates out of Richmond and Virginia Beach with a full fixed and ship ladder service line. All systems are backed by a 5-year warranty with PE-certified anchor testing.


Company Service Area Best For Key Differentiator Emergency Response
VA Commercial Repair Solutions Shenandoah Valley & Central VA Custom rooftop ladders + HVAC access In-house fabrication, Class A licensed Yes, 24/7
Diversified Fall Protection Statewide VA Engineered fall protection + ladders PE-designed systems, full liability coverage Confirm directly
EDGE Fall Protection Statewide (all 50 states) HVAC rooftop + custom fall protection Non-penetrating systems, Fortune 500 clients Confirm directly
Valcourt Group Hampton Roads, Richmond, Northern VA Fixed and ship ladders + inspection 5-year warranty, PE-certified testing Confirm directly


1. VA Commercial Repair Solutions: Central Virginia's Custom Ladder Fabrication Specialist

Quick note: VA Commercial Repair Solutions is our company. We believe it belongs here — but you should know whose list this is.

Most contractors offering safety ladder installation source prefabricated components and assemble them on-site. VA Commercial Repair Solutions fabricates rooftop safety access ladders in-house using TIG and MIG welding. Custom dimensions, custom materials, and site-specific geometry — built from scratch, not adapted from a catalog.


Based in Fishersville in Augusta County, they cover Charlottesville, Harrisonburg, Staunton, Waynesboro, Lexington, and the surrounding Shenandoah Valley. They work exclusively with commercial and industrial clients. A live manager or owner answers every call, 24/7/365 — no voicemail, no automated system.


What qualifies them


VA Commercial Repair Solutions holds Virginia Class A mechanical and electrical licenses (VA #2705180394) — the state's highest contractor tier. There is no project size cap at this license level. Their rooftop safety access ladder service is a natural extension of their commercial HVAC and mechanical practice.


In-house TIG and MIG welding capabilities set this apart from most installation providers. Custom walk-in case work, stainless steel ductwork, and rooftop ladder fabrication all happen on the same shop floor. That fabrication depth means site-specific ladder geometry isn't a subcontracting problem — it's solved in-house.


Their S.W.A.M. and eVA certifications make them eligible for Virginia state and local government contract work. Institutional facility managers at schools, government buildings, and public properties can access their services through existing Virginia procurement pathways.


Ladder systems and services


VA Commercial Repair Solutions designs and fabricates permanent fixed access ladders for commercial rooftops. The primary application is rooftop unit access — safely reaching RTUs, exhaust fans, and chillers on commercial building roofs. Rooftop fall protection systems complement the ladder work.


Their cross-trade capability brings a distinct design advantage. An HVAC contractor that fabricates the ladder for its own rooftop work sees the design from a service technician's perspective. The ladder is sized and positioned for actual service workflow — not just minimum code dimensions.


They install the equipment that requires the ladder. That means placement accounts for real technician movement, not just minimum code compliance.


Cost and timeline


Installation quotes are always free. The service call fee is waived when installation work is performed. New installations include one year of free labor and free scheduled preventive maintenance. The company registers all equipment warranties on the client's behalf.


Their written guarantee: if they can't complete the agreed work, $50 cash and a $500 credit toward an alternative solution. No other contractor in central Virginia publishes an equivalent commitment.


Ideal for


This is the right fit for commercial and industrial facilities across central Virginia and the Shenandoah Valley. Restaurant buildings, hotel properties, food production facilities, warehouses, and office parks all qualify. The fit is strongest when ladder design must account for existing equipment placement and regular HVAC service access.


Contact VA Commercial Repair Solutions for a free installation quote.


2. Diversified Fall Protection: Virginia's Engineered Fall Protection Specialist


Diversified Fall Protection has built fall protection systems since 1994. They describe themselves as the largest turnkey fall protection integrator in the United States. Their service model spans design, engineering, fabrication, installation, training, and recertification under a single contract.


They are not a product supplier. Their in-house Professional Engineers and structural engineers own the full system lifecycle.


Virginia coverage is direct and local. Territory Manager Anthony Brouwer holds an 804 area code (Richmond) and covers Virginia, North Carolina, South Carolina, and Tennessee. Virginia clients reach a regional contact with technical authority, not a national intake line.


What qualifies them


Their liability commitment is the sharpest differentiator in this market segment. Diversified's program is called "Your System. Our Liability" — the company formally assumes liability for every system they install. For facility managers who need clear assignment of responsibility on life-safety equipment, that policy changes the risk equation entirely.


Their in-house structural engineers design against OSHA 1910, 1926, 1915, and ANSI Z359.2 standards. VOSH — Virginia's state-plan OSHA program — governs all of the Virginia work. Non-destructive proof testing and PE certification accompany every qualifying installation. Compliance documentation comes from the engineering team, not a third-party consultant.


Their EZ Series Fixed Access Ladder (US Patent #11,142,951) is their proprietary rooftop solution. It features a 20-inch rung width, a 30-inch walk-through opening, and hot-dip galvanized finish. Flat stock side rails and grooved rungs provide handholds and traction throughout.


Ladder systems and services


Diversified's roof access ladder catalog includes:


  • Fixed ladders and ladder anchors
  • Vertical lifeline systems
  • EZ Ladder Guards — restrict unauthorized access between service visits


The EZ Series uses bolt-on adjustable stand-off brackets — no permanent welds to the roof structure. That matters for facilities where roof membrane penetration creates warranty issues.


Beyond ladders, their full catalog covers:


  • Anchor systems and cable lifelines
  • Guardrail systems and roof hatch guardrails
  • Modular access platforms
  • Skylight protection and walkway systems


A Virginia facility starting with a ladder installation can build out a complete rooftop program under one contractor. No vendor switching needed.


Training programs cover Authorized User and Competent Person credentials. This is directly relevant for facilities whose maintenance staff operate within the installed system daily. Installation and training from the same provider closes the gap between system design and safe daily use.


Cost and timeline


Pricing is project-based and quote-driven. Contact Anthony Brouwer at (804) 570-5933 or through fallprotect.com to initiate a site assessment. Diversified conducts fall hazard assessments as a first step — understanding rooftop geometry, equipment placement, and access requirements before designing the system.


The EZ Series modular sections reduce freight costs and can compress installation time on straightforward rooftop ladder projects. Multi-trade scopes — ladders plus guardrails plus lifelines — require longer planning and installation windows.


Ideal for


Multi-facility Virginia operators, property managers, and institutional facilities needing engineered fall protection with full PE documentation and liability coverage. Their multi-system capability covers ladders, anchors, guardrails, lifelines, and modular access platforms. This is the right fit when rooftop safety extends beyond a single access ladder.


3. EDGE Fall Protection: Rooftop HVAC Access Specialists with National Installation Reach


EDGE Fall Protection designs and installs OSHA-compliant fall protection systems across all 50 states. Founder Michael McCarty brings over a decade as a Competent Person Trainer in fall protection design, engineering, and installation. Government clients include the Department of Veterans Affairs and the U.S. Army Corps of Engineers. Commercial clients include Microsoft, 3M, and Ecolab.


Their rooftop HVAC equipment fall protection expertise is directly relevant to Virginia facilities managing rooftop units, chillers, and air handlers. They build custom guardrail systems sized around individual HVAC equipment — designed for the equipment configuration, not just the roof deck.


What qualifies them


EDGE builds to OSHA 1910 and ANSI standards throughout. Their Fixed Ladder Fall Arrest System meets ANSI Z359.16 and OSHA 1910.140. The system uses 3/8-inch, 1×7 galvanized steel cable rated at 3,600 lbs. It supports a two-user configuration at up to 620 lbs combined weight.


Their rooftop HVAC guardrail systems are non-penetrating. Mounting to concrete pads, I-beams, or ballasted bases requires no drilling into the roof or HVAC equipment. Non-penetrating installation preserves both the roofing warranty and the equipment manufacturer warranty. That matters on newer commercial buildings where active warranties are still in force.


EDGE's systems are pre-engineered for major commercial HVAC brands and rooftop equipment configurations. Facilities with a known rooftop equipment inventory can specify systems matched to their installed units rather than adapting generic dimensions.


Ladder systems and services


EDGE's fixed ladder product line covers their vertical cable-based fall arrest system for ladders exceeding 24 feet. The bolt-on brackets accommodate various existing fixed ladder styles without requiring full ladder replacement in many retrofit scenarios. That compatibility matters for older Virginia commercial buildings with dated ladder infrastructure.


Their broader catalog includes:


  • Non-penetrating guardrails and industrial safety gates
  • Skylight protection and crossover stairs
  • Custom-engineered solutions for unusual rooftop configurations


Annual inspections and system certifications are part of their ongoing service model. A facility that purchases an EDGE system can establish a recertification schedule with the same installer.


The passive protection model is a design advantage for high-frequency access points. Passive systems protect workers immediately upon exposure without requiring harness donning or clip-in steps. For rooftop service personnel on regular schedules, passive protection reduces training burden and harness compliance risk.


Cost and timeline


EDGE is a national company with full-service engineering, installation, and inspection support across Virginia. Contact them through edgefallprotection.com for a site consultation and system proposal. Pricing is quote-based, and their turnkey model includes engineering documentation and compliance sign-off.


Non-penetrating guardrail systems for individual rooftop units typically complete faster than fixed ladder installs requiring custom fabrication. Their nationwide installation teams cover Virginia markets without third-party subcontractor coordination delays.


Ideal for


Virginia commercial and institutional facilities needing rooftop fall protection designed around existing HVAC equipment. That includes office buildings, hotel properties, medical facilities, university campuses, and industrial plants. Particularly appropriate for organizations with government compliance requirements and multi-facility operators needing a single national vendor.


4. Valcourt Group: Hampton Roads and Richmond's Fixed and Ship Ladder Specialist


Valcourt Group provides building services across the eastern United States, with permanent operations in Virginia Beach and Richmond. Their Washington, DC office covers Northern Virginia. Fall protection, including fixed and ship ladder installation, is a formal service line at every Virginia location.


It is not a secondary offering bundled with other services.


Ladder systems are built from high-grade structural aluminum with optional powder coating. Configurations span angled, vertical, caged, and fold-down designs. This range covers building access requirements beyond the standard vertical rooftop climb.


All systems carry a 5-year warranty.


What qualifies them


Valcourt's ladder systems include fall arrest systems for fixed ladders exceeding 24 feet — the OSHA threshold for required active fall protection. Anchor testing and annual inspections are overseen by a qualified Professional Engineer. PE involvement closes the documentation loop. Facilities get verifiable proof of compliance, not just a contractor's signed form.


They comply with OSHA 1910.28, 1910.29, and 1910.22 — the walking-working surfaces rules for fixed ladders and fall protection methods. These rules govern safety requirements in commercial facilities. Annual inspections put a PE-certified technician on-site on a defined schedule.


This matters for facilities whose staff access rooftop equipment regularly across multiple seasons. Their broader practice includes:


  • Anchor systems and guardrail systems
  • Modular access platforms
  • Roof hatch guardrails with self-closing safety gates
  • Skylight protection and walkway systems


A ladder installation is a natural entry point to building a comprehensive rooftop safety program with a single provider.


Ladder systems and services


Valcourt designs, supplies, and installs fixed ladders in four configurations:


  • Angled and vertical — cover exterior building and interior access routes
  • Caged — for access points where safety programs specify cage protection
  • Fold-down — restrict unauthorized access while allowing authorized entry


Their 5-year warranty on ladder systems is a longer commitment than most competitors in this market publish. Annual inspections — PE-certified and documented — create a compliance audit trail. Facilities can present it to insurers, landlords, or OSHA inspectors on demand.


For properties under insurance or lease agreements mandating documented safety maintenance, that trail has direct commercial value.


Valcourt installs complementary rooftop components alongside ladders — perimeter guardrails, roof hatch guardrails, and walkway systems. These protect roofing membranes and define safe transit paths for service personnel.


Cost and timeline


Contact Valcourt through valcourt.group for a site assessment and proposal. The Virginia Beach location is at 230 Clearfield Ave, Suite 113. Richmond and Northern Virginia are served by their respective regional divisions.


Pricing is project-based and scope-dependent.


Their 5-year warranty and annual inspection programs are quoted as ongoing service agreements, not one-time installation costs. Factoring in the full inspection schedule when comparing proposals gives a more accurate total cost of ownership than installation price alone.


Ideal for


Hampton Roads businesses, Richmond commercial operators, and Northern Virginia facilities needing fixed or ship ladder installation. PE-certified compliance documentation and an ongoing inspection program come with every system. Particularly relevant for property managers, commercial landlords, and institutional facilities.


They need auditable safety system records for insurance, lease, or government audit requirements.


Common Questions About Safety Ladder Installation in Virginia


What OSHA standard governs fixed ladders on Virginia commercial buildings?

Virginia operates under VOSH — the state's own OSHA-equivalent program administered by the Virginia Department of Labor and Industry. VOSH adopts federal OSHA standards, including 29 CFR 1910.23 for fixed ladders. The key threshold: fixed ladders exceeding 24 feet require active fall protection.


Either a ladder safety system or a personal fall arrest system qualifies. Ladders installed before November 19, 2018 had a compliance transition period for caged designs. New installations must use non-cage active protection from the date of installation.


What is the difference between a cage and a personal fall arrest system on a fixed ladder?

A cage (or ladder well) is a passive structure surrounding the ladder. Historically it was used to theoretically slow a fall rather than arrest it. Research and incident data showed cages don't reliably prevent fatal falls, and OSHA updated its standard accordingly.


A personal fall arrest system attaches the climber to a vertical lifeline via a sleeve that locks immediately upon a fall. A ladder safety system provides the same protection through a mechanical rail or cable track. Both active approaches are now required for new fixed ladders exceeding 24 feet.


Caged ladders installed before 2018 may retain their design under certain conditions, but new installs require one of the active methods.


What is the difference between a fixed ladder and a ship's stair for rooftop access?

A fixed ladder is vertical or near-vertical, with rungs the climber faces while ascending and descending. A ship's stair is inclined — typically 50 to 70 degrees — with steps and handrails on both sides. Ship stairs are easier and safer to descend and allow forward-facing movement.


They require more rooftop footprint than vertical ladders. The right choice depends on available space, access frequency, and the physical demands on maintenance staff. Consider how often service personnel will use the access point throughout the year.


What materials are standard for OSHA-compliant commercial safety ladders?

Aluminum is the most common material for commercial fixed ladders. It resists corrosion without painting or rust management, making it suitable for outdoor rooftop installation with minimal ongoing maintenance. Galvanized steel — hot-dip galvanized specifically — is the alternative, providing long-term corrosion protection for demanding outdoor environments.


Stainless steel applies in high-corrosion environments such as coastal proximity or chemical exposure. For Virginia facilities inland — Shenandoah Valley, central Virginia — hot-dip galvanized steel and structural aluminum are both well-suited. Facilities closer to the Virginia coast should weight corrosion resistance more heavily when selecting material.


Do I need a permit to install a fixed ladder on a Virginia commercial building?

Yes, in most jurisdictions. A fixed ladder on a commercial building typically requires a permit and inspection. The Virginia Uniform Statewide Building Code governs this in most localities.


Requirements vary — Charlottesville, Harrisonburg, Richmond, and Virginia Beach each have their own inspection departments. A licensed Class A mechanical or general contractor handles permit applications as part of the installation scope. Unlicensed installation skips the inspection step — producing a non-compliant ladder with no documentation and compounding safety and legal liability exposure.


How often should a commercial safety ladder be professionally inspected?

OSHA requires ladder safety systems and fall arrest anchors be inspected before each use by a competent person. Formal annual inspection by a qualified person is also required. Commercial facilities with regular rooftop access benefit from documented annual inspections.


A qualified inspector or PE produces written records of system condition, load test results, and required corrective action. That documentation satisfies insurance compliance requirements, lease terms, and OSHA inspection responses. Annual inspection programs are offered by Diversified Fall Protection, EDGE, and Valcourt Group as part of their ongoing service agreements.


Conclusion: Get It Right the First Time


Safety ladder installation in Virginia is not a commodity service. OSHA compliance requires precise dimensions, correct materials, appropriate fall protection for the ladder height, and documentation that holds up under audit. The wrong contractor produces a ladder that looks compliant and isn't. That distinction only becomes visible during an OSHA inspection or after an incident.


A compliant rooftop access ladder is a one-time investment that protects every service visit after it. Don't cut corners on design or credentials. Verify licensure, confirm fall protection experience, and ask for compliance documentation before any work begins.


Rooftop access issue at your Virginia facility? Contact VA Commercial Repair Solutions — live phone, 24/7, no voicemail, in-house fabrication, and Class A licensed across mechanical and electrical.
August 14, 2026
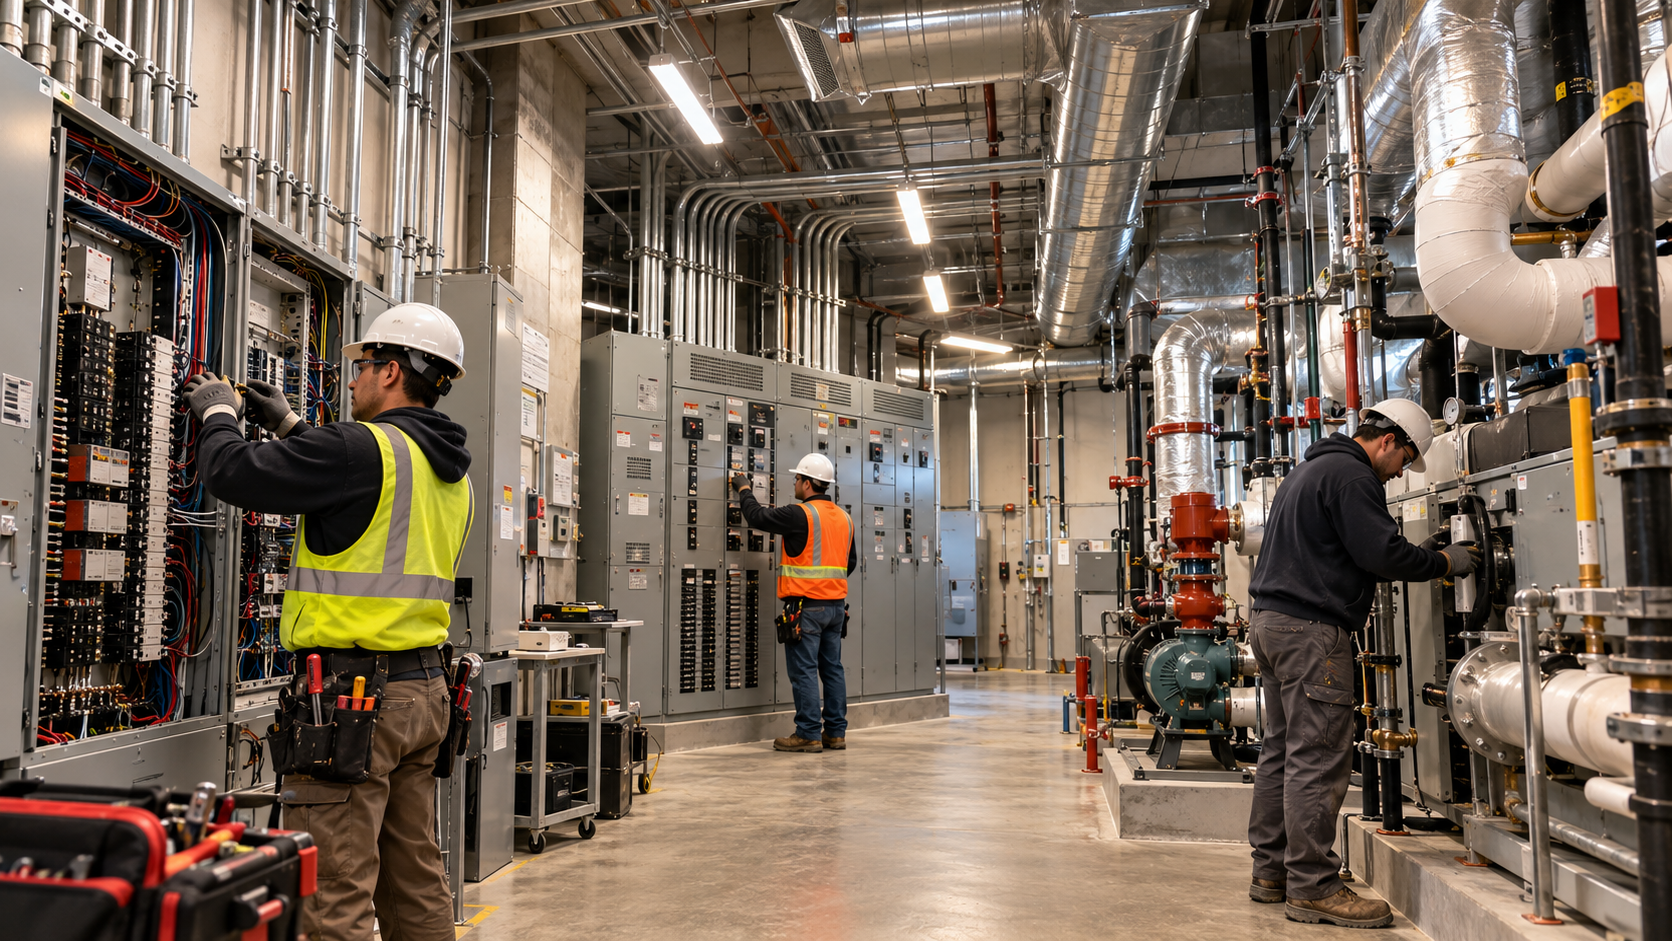
 Commercial electrical problems don't schedule themselves. A failed panel, a tripped breaker, or a code violation flagged during inspection all demand action. Getting the right contractor on-site — fast — makes the difference. Virginia's commercial electrical market runs from federal contractors in Northern Virginia to food processors in the Shenandoah Valley. A company that dominates Hampton Roads isn't dispatching to Roanoke. Geographic fit matters as much as licensing tier. This guide covers the six best commercial electricians in Virginia for 2026. Each was evaluated on license class, geographic coverage, trade depth, credentials, and how they actually serve commercial and industrial clients. Virginia's Best Commercial Electricians at a Glance VA Commercial Repair Solutions covers central Virginia and the Shenandoah Valley with Class A electrical and mechanical licenses. Live-person staffing is available 24/7 — no voicemail. Harris Electric Co. of VA has served Richmond's commercial market since 1960, now in its third generation of family ownership. Blackout Electric brings Class A credentials and a military-veteran-owned model to Hampton Roads. Their documented portfolio includes government and institutional projects across the region. Hitt Electric Corp. has served Virginia Beach schools, hospitals, and federal facilities for over 50 years. Hopkins | Lacy covers Roanoke and Charlottesville with employee-owned MEP design-build depth dating to 1922. Kolb Electric has operated since 1925 in Northern Virginia and the DC metro. They maintain the largest bucket truck fleet in the region.
August 14, 2026
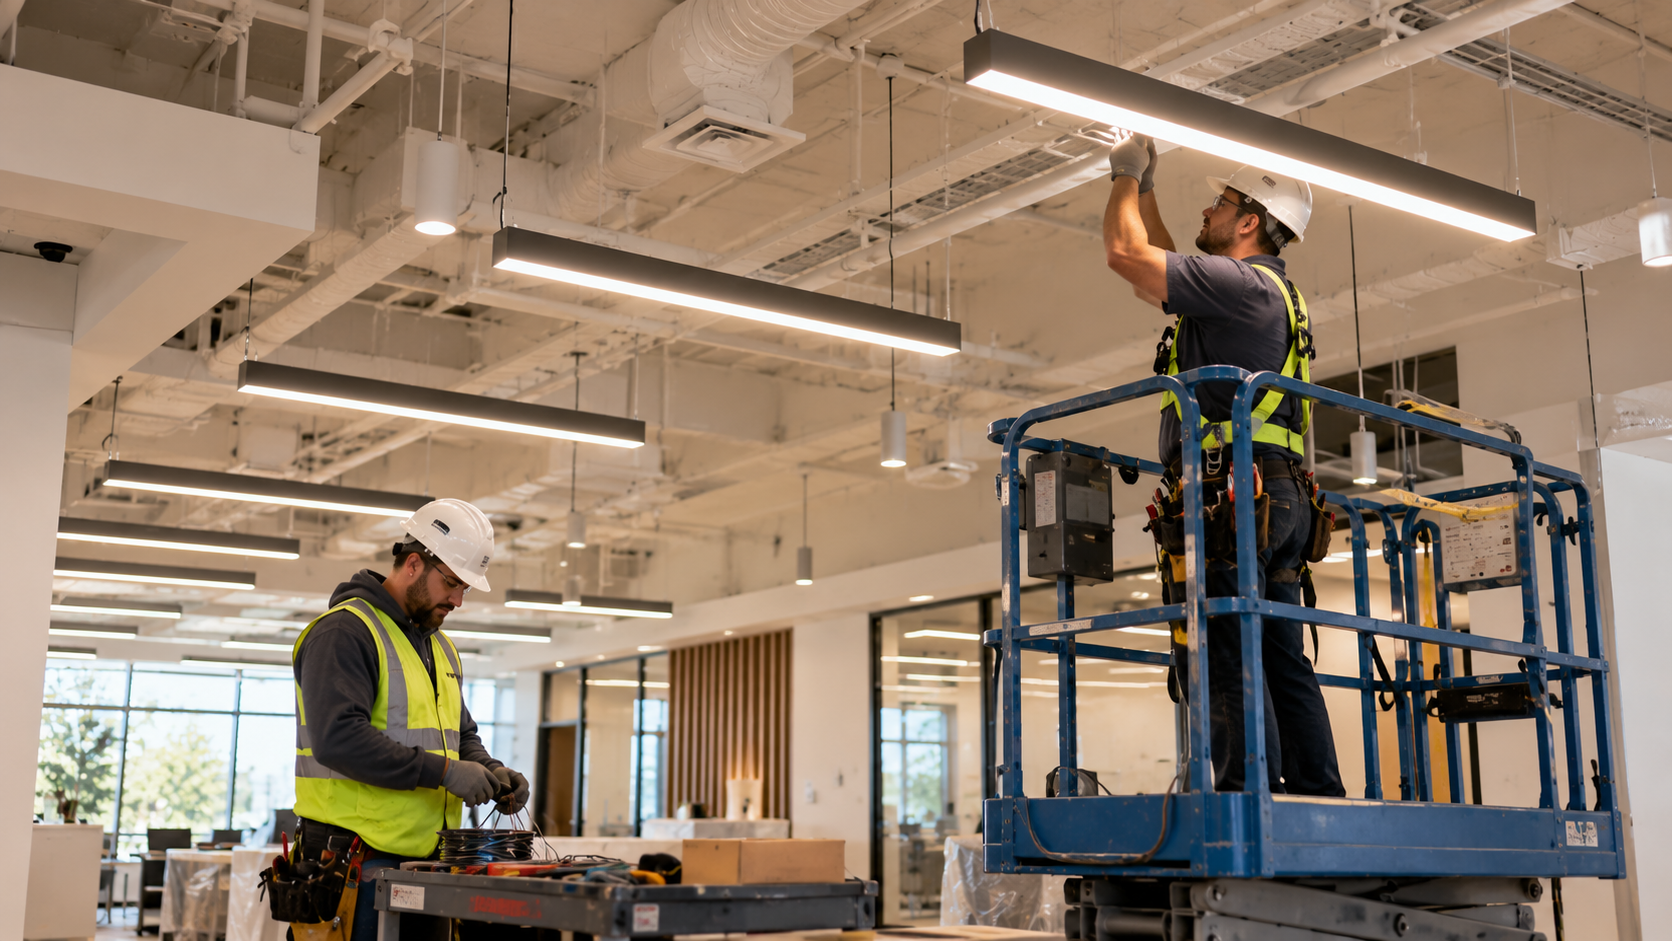
Your furnace quits on the coldest morning of the year. Employees are freezing, customers notice immediately, and every hour without heat costs real money. Most business owners do the same thing: type "furnace repair near me" and call whoever ranks first. Speed without vetting can land you with an unqualified technician and a furnace that breaks again in weeks. This guide walks through every step — from spotting warning signs early to hiring a contractor you can trust. Finding reliable commercial furnace repair quickly is not about luck. It is about knowing what to look for before you make the first call. Follow these steps and you will move faster and smarter than most. Step 1: Recognize the Warning Signs Before the Breakdown The best time to find a furnace repair company is before the emergency arrives. These warning signs give you a window to act on your own terms. Miss them, and you are making frantic calls with no leverage and no heat. Strange noises are the first signal most technicians flag. Banging on startup means delayed ignition — a gas buildup that fires late. Grinding or squealing points to failing motor bearings or a worn belt. A yellow or orange pilot flame is a stop-everything warning. A healthy commercial furnace burns blue. Yellow or orange signals incomplete combustion — evacuate and call a technician immediately. Short cycling — when the furnace starts, runs briefly, then shuts off — kills components fast. Rising energy bills without an obvious cause tell the same story. Uneven temperatures across building zones suggest a blower or ductwork problem. According to furnace repair warning signs , catching a bad ignitor early is a $150–$500 repair. Letting the problem damage the heat exchanger pushes that figure past $1,500. The difference between those outcomes is catching the warning before it cascades. Gas or burning smells require immediate action. A gas odor means evacuate first, then call. A persistent burning smell from the vents suggests overheating components — shut the system down and do not restart it. Not every warning sign is an emergency. Banging noises and gas smells are immediate calls. Uneven heat or rising bills can typically wait for next-day service — but do not let them sit a week. Delayed action on secondary symptoms is where most avoidable breakdowns originate. Step 2: Search With Precision, Not Just Speed "Furnace repair near me" returns a mix of residential and commercial results. That is a problem. A technician who primarily services homes is not always equipped or licensed to handle commercial heating equipment. Search specifically: "commercial furnace repair [your city]." In central Virginia, that means adding Charlottesville, Harrisonburg, Staunton, or Waynesboro to the query. Local specificity matters — contractors serving the Shenandoah Valley understand the climate demands and building types in the region. Pay attention to what a company leads with on its website. A contractor whose homepage says "keeping homes comfortable" serves homeowners. You need one whose site talks about commercial facilities and industrial buildings — a completely different scope. Also check these secondary sources before calling: Google Business Profile reviews — look for reviewers who are businesses, not homeowners BBB business search for complaint history and current rating Angi and similar directories, filtered to commercial specialization Review scans reveal whether a contractor works commercial systems regularly or treats them as an add-on. Look for patterns, not outliers — one bad review in five years differs from recurring complaints about upselling. That distinction matters before the first phone call. Step 3: Verify Credentials Before You Book This step takes five minutes and protects you from serious risk. In Virginia, all mechanical contractors must hold a license from the Department of Professional and Occupational Regulation. Verify any contractor at the Virginia DPOR license lookup — a free, real-time public database. Here is what to look for in the record: License class. Virginia issues Class A, B, and C contractor licenses. Class A is unlimited in project value; Class B caps at $120,000; Class C at $10,000. For commercial furnace work, verify Class A. Specialty codes. A general contractor license does not automatically authorize HVAC or mechanical work. Confirm the license includes the HVAC or mechanical specialty designation. Per the Virginia contractor license guide , a general license without the right specialty code is incomplete coverage. Entity match. The name on the license must exactly match the name on the invoice. A sole proprietor license does not cover work done under an LLC. This mismatch creates liability exposure on your end. Insurance. Ask for a certificate of liability insurance and proof of workers' compensation coverage. If a technician is injured on-site without workers' comp, you could be liable. Get both documents in hand before work begins. An A+ BBB rating is a useful secondary signal. DPOR verification, however, is non-negotiable — no exceptions. Step 4: Ask These Questions Before Booking A short phone call tells you most of what you need to know. Per questions to ask first, the best screening happens before the technician arrives. Work through these before you commit. "Are you licensed for commercial mechanical work in Virginia?" Push for the DPOR license number. Verify it yourself — the lookup takes two minutes and confirms whether the answer is real. "Is there a service call fee?" Reputable commercial contractors often waive the fee when a repair is performed. Know this upfront. A separate call fee on top of labor is a different pricing model — ask about it before you book. "Can I get a written estimate before you start?" This is not negotiable. Any contractor unwilling to put a price in writing before touching your equipment is one to avoid. Written quotes protect both parties from scope disputes. "Are your technicians paid on commission?" Commission-based technicians have a financial incentive to upsell replacement over repair. Technicians paid hourly or on salary have no such pressure. Ask directly — the answer tells you a great deal. "What is your repair-before-replacement policy?" A contractor who leads with replacement on every call is not serving your interests. A reliable contractor shows evidence — meter readings, gauge pressures, component tests — before recommending a new system. "Do you answer calls 24/7, or does voicemail pick up after hours?" Furnaces do not break on a schedule. A contractor rolling calls to voicemail after 6 PM is not a viable partner for commercial facilities. A live manager answering at midnight in January is a fundamentally different service. Step 5: Know the Green Flags — and the Red Ones Speed is not reliability. The lowest bid is not the best value. Here is how to quickly sort contractors worth hiring from those worth skipping. Green flags 24/7 live answering with no voicemail. This is the single most important operational differentiator for commercial clients. When heating fails during a January cold snap, voicemail is not an answer. That kind of policy — a manager or owner, not a call center — is built for businesses, not homeowners. Repair-before-replace as a written, guaranteed policy. This phrase in writing, backed by a dollar guarantee, signals an ethical commitment. The companies worth hiring commit to showing evidence before recommending replacement — they do not just claim they will. Background-checked, drug-tested technicians. Commercial facilities have access requirements that differ from residential homes. A contractor that screens its team provides a baseline of accountability that matters. Ask for documentation — not just a verbal assurance that screening is done. In-house capabilities. Contractors who fabricate ductwork in-house, carry parts on service trucks, and cover multiple trades resolve problems faster. Subcontracting each component adds delay at every handoff. A contractor who cannot control the timeline cannot own the outcome. Preferred-service relationships with major brands. Authorized service technicians for Carrier, Trane, Lennox, Goodman, and similar manufacturers know these systems at a deeper level. Parts sourcing is faster and first-visit fix rates are higher. Red flags Voicemail after hours. Period. For a commercial client, this is a deal-breaker. No after-hours answer means no help when the equipment fails on a Saturday night before your busiest week. No written quote before work begins. This enables invoice expansion after the job is done. If they resist, that tells you how disputes will be handled later. Pressure to replace without showing evidence. If the technician declares the system dead without a meter test, ask to see the reading. If they cannot produce it, walk away. A component-level diagnosis is not optional — it is the job. No verifiable DPOR license. If the lookup returns nothing for the name or license number, stop. Unlicensed contractors carry no bond and no oversight — disputes end in small claims court, not a license board. Reluctance to answer direct questions. A contractor who hedges on licensing, insurance, or fee structure is not being vague by accident. That pattern of evasion tells you how the rest of the job will go. Step 6: Get the Estimate in Writing Before any technician touches your equipment, get a written estimate itemizing parts, labor, and additional charges. This protects you from invoices that grow after the fact. Verbal agreements leave room for dispute; written estimates do not. A written estimate also creates a baseline when comparing quotes from more than one contractor. Bring quotes from two or three providers before authorizing work on any major repair. The difference in pricing can be significant — and revealing. A proper written estimate covers the scope of work, the parts to be replaced, and the labor rate. It should also state whether the quoted price is flat-rate or subject to revision if diagnostics reveal additional problems. Get this before the first wrench turns. Ask about the warranty on both parts and labor. Reputable commercial contractors typically offer 90 days on labor and a manufacturer warranty pass-through on parts. Any contractor unwilling to stand behind the work is signaling something about how they operate. No warranty offered on the repair is a red flag — full stop. Get the warranty terms in writing alongside the estimate. That document matters if a part fails two months after the repair. Step 7: Apply the Repair vs. Replace Decision Carefully Before authorizing any significant repair, know where your furnace sits on the lifespan curve. The repair vs. replacement guide outlines the standard industry threshold. If repairs hit 50% or more of replacement cost on a 15-year-old furnace, replace it. Commercial furnaces generally last 15–25 years with proper maintenance. A unit inside that window with a clean service record is almost always worth repairing. A unit past 20 years with repeated failures likely costs more in emergency calls than a new system would. The average furnace repair cost runs $64–$1,475 depending on the component, with a national average around $318. A failing blower motor runs $150–$2,000; a heat exchanger can exceed $1,500. Those numbers compared against your system's age and service history tell the real story. Your contractor should walk through this analysis before recommending replacement. If they skip straight to "you need a new system," push back and ask for the component-level evidence. A trustworthy technician shows the failing part, the meter reading, or the test result — not just a quote. Step 8: Prevent the Next Emergency With a Maintenance Plan Finding reliable furnace repair quickly solves today's problem. Preventing the breakdown in the first place solves the bigger one. A scheduled maintenance plan is how commercial facilities stay ahead of both. Commercial systems should be professionally serviced at least twice a year — once before heating season, once before cooling. Per the commercial HVAC maintenance guide , this schedule cuts unexpected breakdowns and keeps the manufacturer warranty valid. Skipping visits often voids that coverage. A quality plan covers: Filter inspections Refrigerant pressure checks Coil cleaning Sensor calibration Electrical inspections Motor lubrication Some plans also include equipment warranty registration on your behalf. When a covered component fails, the contractor handles the claim. Look for a plan with a fixed service schedule. The best plans treat the contractor like a facility partner, not a break-fix vendor. Expect a written service record after each visit and a consistent technician who knows your equipment by name. Preventive maintenance builds a documented service history. When a technician recommends replacement, that record shows whether the advice fits the equipment's wear pattern. Documentation protects you from convenience-driven suggestions — and gives you a position when comparing contractor opinions. Frequently Asked Questions What information should I have ready before calling a furnace repair company? Have the furnace's make, model, and serial number ready — typically on a label inside the cabinet door. Note when the problem started, what sounds or smells you observed, and whether any heat is reaching the building. The more specific you can be, the faster the technician can pre-load the right parts before arriving on-site. Is same-day commercial furnace repair realistic? Yes — for most common failures, it is. Most repairs take two to four hours when the technician carries the right parts. A contractor with live answering can dispatch same-day, even on weekends, unless the repair requires a special-order part. Same-day service is a reasonable expectation — ask any contractor about their typical dispatch window. How much does commercial furnace repair typically cost? It varies by component and system size. Common repairs range from $64 to $1,475, with a national average around $318. A failing blower motor runs $150–$2,000; a cracked heat exchanger can exceed $1,500. Commercial systems often sit at the higher end of these ranges given equipment scale and labor access. What is the 50% rule for deciding between repair and replacement? The 50% rule is the standard industry benchmark. If a repair runs 50% or more of a new unit's cost on a 15-year-old furnace, replacement typically wins. Service history matters too — one major repair on a well-maintained system differs from a pattern of recurring failures. What is the difference between a furnace tune-up and a repair? A tune-up is preventive: a technician inspects, cleans, and calibrates the system before a failure develops. A repair addresses an existing fault that has already occurred. Annual tune-ups catch deteriorating components before they become emergency calls mid-winter — when options are fewest. Conclusion: The Fast Path to the Right Contractor Finding reliable furnace repair near you quickly is a process, not a lottery. Know the warning signs, search commercial-specific contractors, and verify licenses through Virginia's DPOR system before you book. Ask the right questions on the first call and get everything in writing. The contractor you want holds a Class A license and answers the phone at midnight. They show evidence before recommending any replacement. Their technicians work on salary — not commission — so the recommendation reflects your equipment's condition, not a sales target. For commercial and industrial facilities across central Virginia and the Shenandoah Valley, VA Commercial Repair Solutions brings 50+ combined years of experience, 24/7/365 live-person answering with no voicemail, and a repair-before-replace guarantee — including $50 cash and a $500 equipment credit if they cannot fix the problem. Contact them directly or visit the website to request service from a live technician today.
August 6, 2026
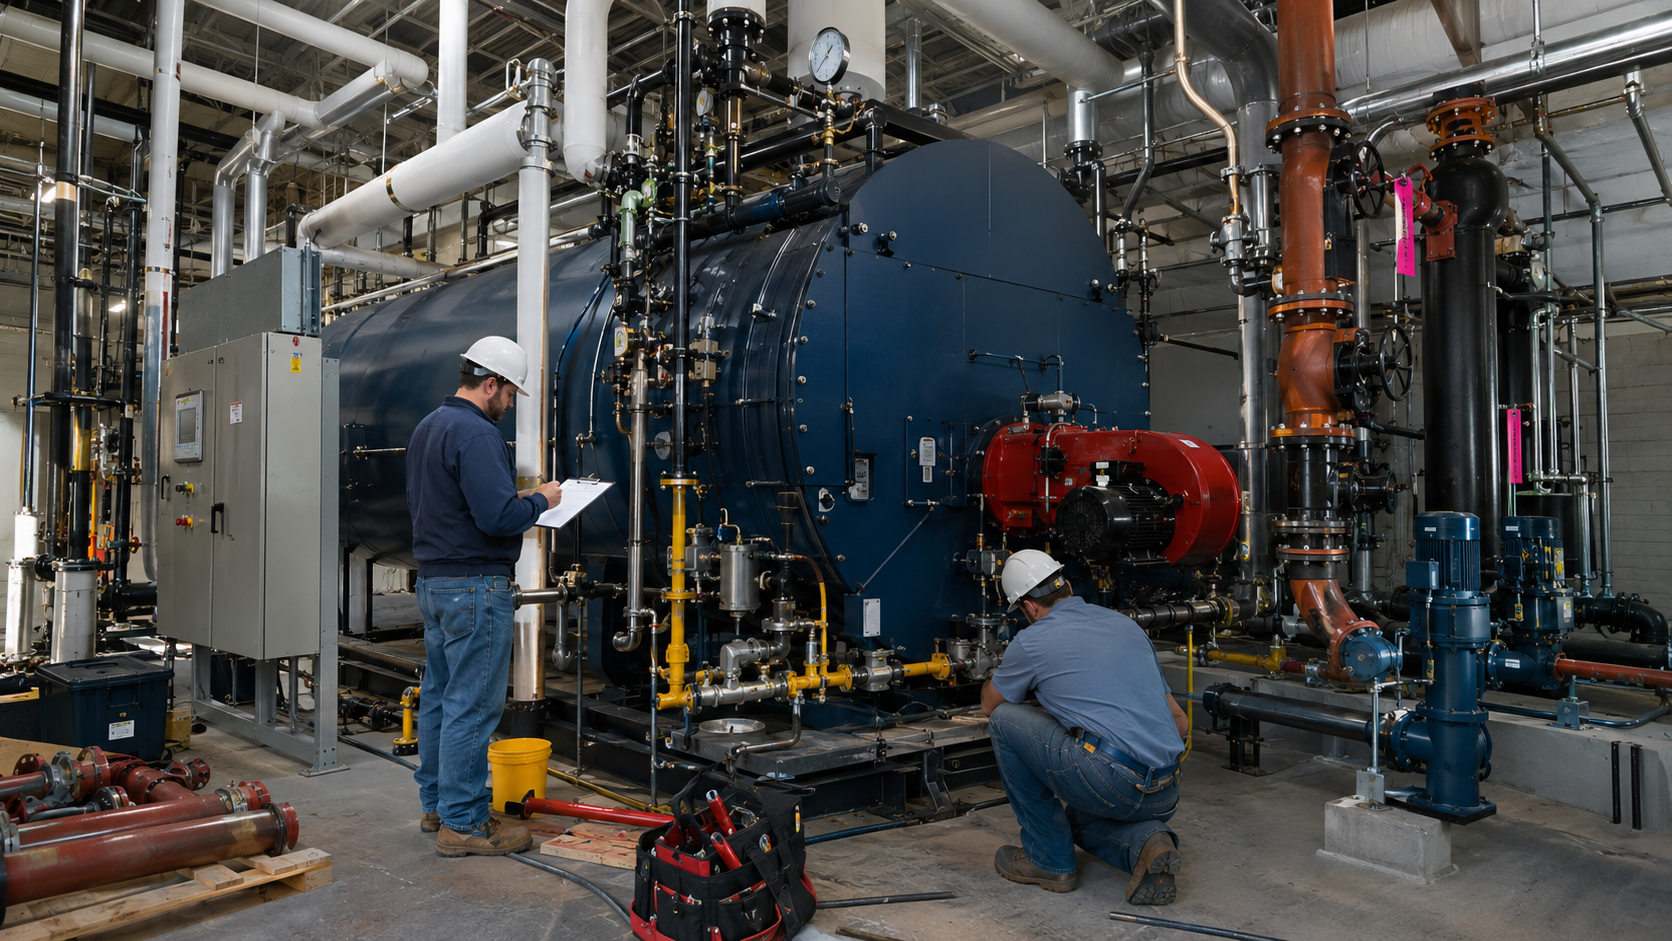
Water pooling beneath a commercial air handler is alarming — but it's rarely mysterious. AC systems produce condensation as a normal byproduct of cooling. The question is where that water goes. When it appears on the floor, in ceiling tiles, or running down adjacent walls, something in the drainage path or refrigerant circuit has failed. Knowing the difference between a water leak and a refrigerant leak matters before you start troubleshooting. Water leaks are condensation failures — moisture the system removes from the air isn't draining correctly. Refrigerant leaks are a different category: the primary symptom is reduced cooling output, not visible water. This guide covers both, but the most common commercial AC complaints — water on the floor, soaked ceiling tiles, overflow from the air handler — are condensation problems. Start there. Most condensation failures follow the same chain: moisture is produced normally, a component in the drainage path fails, water backs up or overflows. Knowing where to look narrows the diagnosis quickly. How Commercial AC Systems Produce Water Commercial air handlers cool indoor air by passing it across a cold evaporator coil. As warm, humid air contacts that cold surface, moisture condenses on the coil — the same physics as condensation forming on a cold glass in summer. That condensed water drips into a drain pan directly below the coil and flows out through a condensate drain line. In Virginia's climate, a commercial air handler in a busy facility can remove several gallons of moisture per hour during peak summer operation. That's a meaningful volume moving through the drain system every day. A partial blockage that might go unnoticed in a dry climate will cause overflow quickly in a high-humidity commercial environment. The condensate drain system is mechanically simple: evaporator coil, drain pan, drain line, and typically a condensate pump if the line must run uphill to reach a floor drain. Each component is a distinct failure point. Cause 1: Clogged Condensate Drain Line The most common cause of commercial AC water leaks is a blocked condensate drain line. Algae, mold, dirt, and biofilm accumulate inside the drain tube over time, partially or completely blocking water flow. When the drain backs up, water fills the drain pan. Once the pan fills, it overflows — onto finished ceilings, equipment, or the floor below. How to identify it: Water pooling beneath or adjacent to the indoor air handler Dark staining on ceiling tiles directly below the unit System shuts down unexpectedly with no obvious mechanical reason — some units include a drain pan float switch that cuts power when water backs up How to resolve it: Turn the system off before touching the drain. Use a wet-dry vacuum at the external end of the drain line to pull the blockage toward you. Follow with a flush of diluted white vinegar — approximately one cup — to kill algae and biofilm coating the interior of the line. Flush with clean water to clear the vinegar. For stubborn blockages, a drain brush through the access port clears debris that vacuuming can't reach. Preventive quarterly drain flushes are the most effective way to avoid repeat blockages. In Virginia's humid summer months, inspecting the drain line monthly during peak cooling season is a practical interval for high-use commercial facilities. Cause 2: Frozen Evaporator Coil A frozen evaporator coil is the second most common cause of water leaks in commercial AC systems. The coil freezes when refrigerant drops below 32°F — caused by insufficient airflow or refrigerant charge below the rated level. Ice forms on the coil surface, grows, and eventually blocks airflow entirely. When the system cycles off, that ice melts rapidly and overwhelms the drain pan. How to identify it: The unit runs continuously but cooling output has dropped significantly Ice visible on the suction line — the larger insulated copper pipe running between the indoor and outdoor units System trips off on its high or low-pressure safety; when it shuts down, a large volume of water suddenly appears How to resolve it: Turn the system completely off. Do not chip, pry, or blast ice from the coil. The aluminum fins deform permanently under contact pressure, reducing airflow for the coil's remaining service life. Allow the coil to thaw fully, which typically takes two to four hours depending on the thickness of ice buildup. Once thawed, identify the cause before restarting. A heavily loaded air filter is the most common culprit — replace it and restart. If the coil freezes again with a clean filter in place, suspect low refrigerant charge, which requires a licensed technician. Cause 3: Cracked or Rusted Drain Pan The drain pan sits directly beneath the evaporator coil and collects condensate before it reaches the drain line. In most commercial air handlers, the pan is metal — and metal corrodes. A small crack or rust perforation routes water directly through the pan rather than through the drain outlet. Water appears below the unit in locations that don't align with where a normal drain overflow would land. How to identify it: Water appearing in spots that don't match the drain line path Rust staining visible beneath or around the unit Corrosion, perforation, or hairline cracks along pan seams and base — particularly in older equipment in humid or coastal environments How to resolve it: Minor cracks in an otherwise structurally sound pan can sometimes be sealed with HVAC-rated drain pan sealant as a temporary fix. A rusted-through or significantly damaged pan requires full replacement — sealing corroded metal is not a lasting repair. Each pan is sized and shaped to a specific equipment model, so confirm the correct OEM or compatible replacement part before ordering. For most commercial air handlers, replacing the drain pan requires partial disassembly — a licensed technician task. Cause 4: Disconnected or Improperly Sloped Drain Line Condensate drain lines require a consistent downward slope toward the discharge point — the standard is 1/4 inch of drop per foot of horizontal run. Without this slope, water sits in the line rather than flowing freely. Vibration from the air handler shifts drain lines over time, and connections separate at fittings. Improper installation during the original job sets up the same problem from day one. How to identify it: Water backing up in the drain pan despite the drain line appearing clear when flushed or vacuumed Visible horizontal sag in the drain line run Disconnected sections at fittings near the drain pan connection or at intermediate supports How to resolve it: Inspect the full drain line run from the pan outlet to the discharge point. Look for sag, disconnected sections, and runs that don't visibly slope downward. Re-support and re-slope sagging sections using appropriate pipe hangers at the correct interval. Re-seat disconnected fittings with HVAC-rated sealant and confirm they're properly supported against vibration. Rooftop unit drain lines are particularly prone to vibration-related separation. Check drain line connections during any rooftop service visit — regardless of whether a leak has occurred. Cause 5: Failed Condensate Pump Many commercial systems are installed in mechanical rooms or ceiling plenums where there's no gravity drain path available. A condensate pump lifts the collected water upward against gravity to a floor drain or building drain. When the pump fails — seized motor, stuck float switch, or clogged reservoir — water backs up exactly as it would from a blocked drain line. How to identify it: Water backing up in the drain pan despite the drain line being clear and properly sloped No audible pump motor activity when the system is running and the pan has water in it Pump's collection reservoir visibly full of standing water with no discharge occurring How to resolve it: Check the pump reservoir for debris blocking the float switch — the most common failure mode, often fixable by cleaning the reservoir. Test the pump manually by lifting the float switch with your hand — the pump motor should activate immediately. If the motor runs but no water discharges, the impeller may be fouled or the discharge line blocked. A failed condensate pump should generally be replaced rather than repaired — pumps are relatively inexpensive components and repair parts are often unavailable. Confirm the replacement pump's flow rate capacity matches or exceeds the original unit's specification. Cause 6: Low Refrigerant Charge Low refrigerant doesn't cause a water leak directly. It causes the evaporator coil to run colder than designed, which leads to coil freezing — and the subsequent water overflow when that ice melts. If you've resolved the drain line and pan and the coil keeps freezing with a clean filter, refrigerant charge is the next diagnosis. Low charge typically results from a leak in the refrigerant circuit, not from refrigerant simply "running out" over time. A closed refrigerant circuit doesn't consume refrigerant — if the charge is low, refrigerant has escaped from somewhere. How to identify it: Coil freezing recurring with clean filters and good airflow Reduced cooling capacity with the system running continuously Hissing or bubbling near refrigerant line connections — though many leaks are slow and silent Oily residue around fittings or line connections — refrigerant oil escapes alongside refrigerant gas How to resolve it: This is not a DIY repair under any circumstances. EPA Section 608 certification is federally required for anyone recovering, recycling, or recharging refrigerant. A licensed technician locates the leak, recovers remaining refrigerant, and repairs the leak point. Copper lines can be brazed; aluminum coil leaks require full coil replacement. The system is then pressure-tested with nitrogen, evacuated, and recharged to the manufacturer's specified level. Attempting to "top off" refrigerant without finding the leak wastes refrigerant and repeats the problem on a shortened cycle. Cause 7: Dirty or Completely Blocked Air Filter A severely restricted air filter is often the one-step cause behind a frozen coil — and therefore behind a water leak that looks more complicated than it is. When an air filter loads heavily with dust, grease, or debris, airflow across the evaporator coil drops below the minimum threshold for keeping refrigerant temperatures within range. The coil freezes. Cooling output drops. When the unit shuts down or the ice melts, the drain pan overflows. Commercial air filters in restaurant kitchens, food processing facilities, and industrial environments load far faster than filters in office or retail spaces. Grease-laden air accelerates filter loading dramatically. A filter lasting two months in an office may load completely within three weeks in a commercial kitchen. Fixed-calendar filter replacement schedules miss this variability. How to identify it: Reduced cooling preceding the water leak, suggesting the freeze developed over days rather than suddenly Filter appears visibly dark or grey and restricts airflow when held to light Ice on the coil that clears when the filter is replaced and the coil thaws How to resolve it: Replace the filter. Let the coil thaw fully — two to four hours — before restarting. Switch to monthly visual filter inspection rather than a fixed replacement calendar, especially in commercial kitchen, food processing, or high-dust environments. Replace at first visible loading, not on a predetermined schedule. When a Technician Is Required Several AC leak causes require licensed professional service. Refrigerant work — leak detection, system evacuation, and recharge — requires EPA Section 608 certification. Aluminum refrigerant coil leaks require full coil replacement, not field repair. Drain pan replacement on most commercial air handlers involves partial unit disassembly that falls outside routine maintenance scope. If water is reaching ceiling tiles above electrical panels, running near wiring, or pooling in areas with active electrical equipment, shut the system off immediately. Water in electrical enclosures creates shock hazards and equipment damage that compound quickly. Suspended ceiling plenums can route water far from the actual leak source before it becomes visible. Don't assume a wet ceiling tile is directly below the problem. Also call a technician if the system is shutting itself down on safety controls repeatedly and the cause isn't a clearly blocked drain or dirty filter. The high-pressure and low-pressure safety cutoffs protecting the compressor from refrigerant-side problems will cycle the unit off repeatedly. Resetting and restarting without diagnosing the underlying cause can destroy the compressor — the most expensive single component in any commercial AC system. VA Commercial Repair Solutions carries an 85% first-visit completion rate on commercial AC calls. Their repair-or-pay guarantee is specific: if the equipment can't be fixed, they pay $50 cash and apply a $500 credit toward a replacement unit. The service call fee is waived when repairs are performed. Common Questions About AC Leaks Is water leaking from my AC a sign of a refrigerant problem? Not necessarily — and usually not. Water leaks from commercial AC systems are most often condensation failures: the drain is blocked, the pan has cracked, or the coil has frozen and thawed. Refrigerant problems primarily show up as reduced cooling performance rather than visible water. The exception is when a low refrigerant charge causes the evaporator coil to freeze and then thaw rapidly, producing a large water release. If the system is both leaking water and failing to cool adequately, pursue both causes in parallel rather than assuming one explains the other. How do I tell a condensate leak from a refrigerant leak? Condensate leaks produce water — dripping from the air handler, overflowing from the drain pan, or appearing in ceiling tiles below the unit. Refrigerant leaks don't produce visible water dripping. The symptoms instead are reduced cooling capacity, ice forming on the suction line or evaporator coil, or an oily residue near refrigerant line fittings. Hissing or bubbling near the lines can indicate active refrigerant escape, though many refrigerant leaks are slow and produce no sound. A technician with an electronic leak detector identifies refrigerant leaks reliably — visual inspection alone misses most of them. Can I clean my condensate drain line myself? Yes — clearing a condensate drain line is one of the few AC maintenance tasks that facility maintenance staff can safely perform. Turn the system off. Use a wet-dry vacuum at the external drain opening to clear the blockage, then flush with a diluted vinegar solution through the access port near the drain pan. The practical limitation is access: commercial air handlers in ceiling plenums or on rooftops may require ladder access and panel removal to reach the drain access point. If you can't safely access both ends of the line, a technician with a drain snake or pressurized flush kit is the right call. Why does my AC only leak on very humid days? High ambient humidity increases the volume of condensate your system must handle — in some Virginia commercial environments significantly. A drain line with a partial blockage that handles a normal summer condensate load may not keep up when humidity spikes and condensate production increases by 30–50%. The same is true for drain lines with insufficient slope: adequate under normal load, insufficient under high-condensate conditions. Fix the drain line regardless. A system whose drain is only adequate under ideal conditions is one humidity spike away from a leak on any given summer day. How long can I safely run my AC if it's leaking water? It depends on where the water is going. If the leak is draining onto an empty floor away from electrical systems and equipment, a brief delay to schedule service isn't immediately destructive. If water is reaching electrical enclosures, building wiring, or moisture-sensitive equipment, shut the system off immediately. Beyond secondary damage, running a system with a blocked drain lets water back up into the air handler — onto the coil surface and blower wheel. That creates mold growth and equipment damage that compound the original repair cost. Conclusion: Diagnose Before You Restart Most commercial AC leaks trace to a short list of causes: a blocked condensate drain, a frozen coil, a cracked drain pan, a disconnected line, or a failed pump. Each has a clear diagnostic path, and most have a repair that can be completed quickly when the right cause is identified. The mistake is restarting the system without diagnosing first. A refrozen coil, ongoing drain overflow, or an unaddressed refrigerant leak creates compounding damage with each subsequent operating cycle. Turn the system off. Identify where the water originates. Work through the causes systematically before restarting. Refrigerant work is federally regulated and requires a licensed technician. Significant water exposure to electrical systems or building components warrants immediate professional response. For everything else, the checklist above gets you to the answer. For commercial AC leaks in central Virginia and the Shenandoah Valley, contact VA Commercial Repair Solutions — live phone 24/7, 85% first-visit fix rate, and no service call fee when repairs are performed.
August 6, 2026
 A microbrewery's mechanical systems aren't built for general contractors. Fermentation room chillers, process piping, glycol loops, draft beer lines, and three-phase power for grain mills — each requires someone who has worked inside that kind of facility before. Using the wrong contractor doesn't just delay a project. It can create food-safety violations, contaminate a production batch, or void equipment warranties. Virginia's craft beverage and agricultural sectors have grown substantially. The state hosts more than 300 licensed wineries and over 100 craft breweries, plus a dense concentration of poultry plants, dairies, and cold storage operations in the Shenandoah Valley. These facilities share a common challenge: most regional mechanical contractors aren't equipped for this work. A restaurant walk-in cooler and a glycol-jacketed fermentation tank are not the same service call. This guide covers the best specialty and industrial contractors serving Virginia's microbreweries, vineyards, and agricultural facilities. Each was evaluated on niche credentials, verified project experience, trade scope, and geographic coverage. Virginia's Top Specialty Contractors for Breweries, Wineries & Agriculture VA Commercial Repair Solutions covers the Shenandoah Valley and central Virginia. They are the only contractor in this guide holding active draft beer system certifications alongside in-house stainless steel fabrication for brewery and winery equipment. Southern Air has Virginia's most verifiable food-and-beverage construction record, including a documented brewery installation at Devils Backbone. Waco, Inc. brings industrial process piping depth to food-and-beverage manufacturing. Their confirmed project work for Virginia Distillery included sanitary stainless steel piping and heat exchanger installation. PHCVA covers Hampton Roads with industrial refrigeration and foodservice maintenance expertise built across nearly five decades. Shenandoah Refrigeration fills northern Shenandoah Valley commercial refrigeration needs in the Winchester corridor.
August 3, 2026
 A failed AC coil stops cooling fast. The system keeps running, drawing power, cycling on and off — but the air coming through the vents is warm. In a commercial facility, that's a revenue problem within hours. Most AC coil problems have a diagnosable cause. The repairs fall into two categories: DIY work you can do safely, and work requiring a licensed technician with EPA certification. Mixing them up costs time and money. This guide covers both. Work through the steps in order. The most common causes — dirty coils, frozen coils, clogged drains — come first. The more technical repairs and replacement decisions come later. What Is an AC Coil and Why Does It Fail? Your AC system has two coils. Understanding which one has failed changes how you approach the repair. The evaporator coil sits inside the indoor air handler. Refrigerant flows through it and absorbs heat from the air passing over it. That's how the system cools your space — not by injecting cold air, but by extracting heat. The condenser coil is in the outdoor unit. It's where the refrigerant releases the heat it absorbed inside. A fan forces air over the condenser coil to reject that heat into the outdoor air. Both coils fail for the same basic reasons: restricted airflow, refrigerant loss, physical damage, or biological contamination. The symptoms differ by coil type. The diagnostic logic is the same — rule out simple causes before assuming the worst. The four main coil problems Dirty coils are the most common commercial AC failure. A coated evaporator coil can't absorb heat efficiently. A dirty condenser coil can't reject it. Both cause the same result: reduced cooling capacity, longer run times, and rising energy costs. Frozen coils occur when the evaporator coil drops below 32°F. That happens when airflow is too restricted to warm the refrigerant passing through the coil. The coil ices over, blocks airflow further, and the system eventually stops cooling entirely. Refrigerant leaks cause gradual cooling loss. The system runs but output drops progressively. Left unaddressed, low refrigerant starves the compressor and causes far more expensive damage. Leaks require a licensed technician. Bent or damaged fins reduce airflow across the coil surface. Fin damage is common in outdoor condenser coils exposed to debris, hail, or careless maintenance. Straightening bent fins is a DIY repair. Physical coil damage is not. Step 1: Shut Down the System Before Any Inspection Always turn off the AC at the thermostat before inspecting either coil. Then locate the disconnect switch — the metal box near the outdoor condenser unit — and switch it off. The thermostat setting cuts the cooling cycle, but it doesn't cut power to the unit. The disconnect switch removes power from the compressor and condenser fan motor. This is the step most people skip. Skipping it creates shock risk when touching components inside the unit. For the indoor air handler, locate and trip the circuit breaker feeding it before opening any access panels. Confirm power is off by checking for running fans or lights on the unit's control board. Step 2: Thaw a Frozen Evaporator Coil If the evaporator coil is iced over, start here before any other repair. Running the system on a frozen coil forces the compressor against excessive head pressure. That causes compressor failure. Do not chip, pry, or blast ice off the coil. Evaporator fins are thin aluminum. Physical contact with ice-covered fins bends them. A bent fin reduces airflow — making the same problem more likely to recur. Turn the system fan to "On" at the thermostat. This runs the blower without the compressor, circulating room-temperature air across the frozen coil. Depending on the amount of ice, full thaw takes 1 to 4 hours. Have towels and a bucket ready — the condensate pan may overflow as the ice melts. Once the coil is fully thawed, identify the root cause before restarting. Freeze-up causes: clogged air filter, restricted return airflow, dirty evaporator coil, or low refrigerant charge. The first three are DIY checks. The last requires a licensed technician. Step 3: Replace the Air Filter Do this before cleaning any coil. A clogged air filter is the most common preventable cause of both frozen coils and reduced cooling performance. Remove the filter and hold it up to a light source. If you can't see light through the filter medium, it's restricting airflow. Replace it immediately. In commercial facilities — restaurants, manufacturing spaces, hotels — filters clog far faster than manufacturer schedules assume. Also check whether the filter has collapsed or pulled away from its frame. A filter that's bypassed lets debris land directly on the evaporator coil surface. If you see a clean filter but a dirty coil, a past filter bypass is likely the reason. For commercial systems with multiple return air paths, check every filter in the system. A single clogged filter in a multi-zone system restricts enough airflow to affect the entire cooling capacity. Step 4: Clean the Evaporator Coil A dirty evaporator coil is the second-most common commercial AC problem after filter neglect. The coil picks up dust, grease, and biological growth over time. A coated coil surface can't transfer heat effectively — output drops while run time and energy costs climb. What you'll need: Soft-bristle brush No-rinse commercial coil cleaner (foaming type) Flashlight Nitrile gloves and eye protection — coil cleaners are caustic Step-by-step: Turn off power to the air handler and open the access panel to the evaporator coil. Use the flashlight to assess the coil surface. Look for visible dirt coating, biological growth (dark or discolored patches), and ice (if the coil just thawed and is now accessible). Spray the no-rinse coil cleaner evenly across the coil face. Let it dwell for the time specified on the product label — typically 10 to 20 minutes. The foaming action lifts debris. No-rinse formulas drain off through the condensate drain line on their own. Use the soft-bristle brush to loosen stubborn surface buildup. Always brush parallel to the fins — never across them. Pressure applied across the fins bends them and permanently reduces airflow. Inspect the condensate drain pan at the same time. Standing water in the pan means the drain line is blocked — address that in Step 6. What not to do: Never use a pressure washer on the evaporator coil. The fins are thin aluminum and deform under direct water pressure. Household cleaning sprays (bleach, all-purpose cleaners) leave residues that accelerate coil corrosion. Use products designed specifically for AC coils. Step 5: Clean the Condenser Coil The outdoor condenser coil rejects heat from the refrigerant circuit. A dirty condenser forces the compressor to work against higher head pressure. That reduces efficiency, increases power consumption, and shortens compressor life. Before cleaning, confirm the disconnect switch is off. Remove any debris from around the unit — leaves, cottonwood seeds, dirt compacted against the fins, or vegetation growing into the coil face. Maintain at least 24 inches of clear space on all sides of the outdoor unit. Cleaning the condenser coil: Remove the top grill (on most residential and light commercial condensers). Set it aside carefully — the condenser fan is typically attached. Access the coil from the inside face where possible. Cleaning from inside out pushes debris outward rather than deeper into the fin surface. Apply a commercial condenser coil cleaner to the fin surface. Let it dwell per the product directions. For lightly soiled coils, a garden hose at low pressure rinses loosened debris through. Keep the spray angle parallel to the fins. Use a fin comb to straighten any bent fins before rinsing. Insert the comb tines between fins and drag parallel to the fin direction. Move slowly. Aluminum fins are soft; they bend again under excessive force. Work in short sections. What not to do: Never use a pressure washer on the condenser coil. Even at low settings, a pressure washer flattens aluminum fins across wide sections of the coil. That damage is permanent and reduces airflow through the coil for the life of the unit. Step 6: Clear the Condensate Drain Line A clogged condensate drain is one of the most frequent service complaints for commercial AC systems in Virginia's humid climate. Standing water in the condensate pan causes mold and biofilm growth, which eventually blocks the line further. When the pan overflows, water damages ceilings, equipment, and finished floors. Locate the condensate drain access point — typically a cleanout cap or plug on the drain line near the air handler. Remove it and use a wet/dry vacuum at the drain outlet (the exterior discharge point) to pull the clog through. If the vacuum doesn't clear the clog, flush with clean water from the access point. For recurring clogs, a slow-drip condensate pan treatment tablet (chlorine-based, available at HVAC supply houses) inhibits biological growth between service visits. Check the drain line routing for sags or low points. Water pools at low points in improperly supported drain lines and becomes a chronic source of clogs. Support the drain line at regular intervals so it maintains a continuous slope to the discharge point. A float switch sits in the condensate pan on most commercial units. When the pan reaches a set level, the float switch shuts the system off to prevent overflow. If your system is short-cycling with no other obvious cause, check the float switch position first. Step 7: Straighten Bent Coil Fins Bent fins reduce airflow across the coil surface — both condenser and evaporator. Hail, debris impact, and careless cleaning with a pressure washer are the most common causes. This is a DIY repair with the right tool. A fin comb is a simple, inexpensive tool. It looks like a specialized comb with multiple sets of tines at different spacings. Match the tine spacing to the fins-per-inch (FPI) count on your coil — most residential and light commercial coils run 12 to 18 FPI. The coil spec is on the equipment nameplate. Insert the correct tine set between fins and move the comb parallel to the fin direction. Don't twist or angle the comb — this bends fins in a new direction rather than straightening them. Work in small sections, inspecting the straightened area before moving on. For condenser coils, straighten fins before cleaning. Crushed fins block airflow and make the cleaning process less effective. When a Licensed Technician Is Required The steps above cover the most common AC coil problems a commercial facility can address in-house. The following failures require a licensed HVAC technician. Do not attempt them without EPA Section 608 certification — refrigerant handling is federally regulated. Refrigerant leak detection and repair Low refrigerant charge is a common cause of progressive cooling loss. Symptoms: longer run times, reduced output, ice forming on the suction line or evaporator coil, and the system running without reaching setpoint. EPA Section 608 requires a licensed technician to locate, repair, and recharge refrigerant leaks. Adding refrigerant to a leaking system without repairing the leak is illegal. Any technician who recommends recharge without finding and fixing the leak source should not be servicing your equipment. The technician will connect manifold gauges to the service ports and measure suction pressure, discharge pressure, superheat, and subcooling. Those readings are compared against manufacturer design specifications for your specific system and ambient conditions. Deviation from spec confirms whether the issue is low charge, overcharge, or a system restriction. Copper coil leak repair (brazeable) Copper coils can be repaired in the field at the leak point. The technician recovers the refrigerant charge and exposes the leak location. They prepare the copper surface and braze-seal the joint with the appropriate alloy. The system is then evacuated to remove moisture and non-condensables, and recharged to spec. Brazing is an effective repair for single, identifiable leak points on copper coils. Leaks at flare fittings and service valve connections are often simpler still — a new fitting or valve can resolve the leak without brazing. But brazing requires proper technique. A poor brace joint fails within a single season. Aluminum coil leaks — replacement required Aluminum evaporator coils are common in modern commercial AC systems. They're lighter, less expensive to manufacture, and resist some forms of corrosion better than copper. But they cannot be repaired in the field the way copper coils can. A refrigerant leak in an aluminum coil means coil replacement. Field brazing techniques that work on copper don't transfer reliably to aluminum. The material properties differ. Failed aluminum "repairs" typically return leaks within one cooling season. Any contractor claiming to permanently fix an aluminum coil leak in place should be pressed for a written guarantee. When a technician shows evidence of an aluminum coil leak — detector reading, oily residue, confirmed low charge — trust the diagnosis. The repair is coil replacement. Full coil replacement Full evaporator or condenser coil replacement is necessary when the leak is too diffuse to localize (multiple pinhole leaks from formicary corrosion), the coil material is aluminum, or the physical damage is too extensive for surface repair. A reputable contractor shows you the evidence before recommending replacement. Electric meter readings, refrigerant detector output, or digital photographs of the leak location are the standard. If a contractor recommends coil replacement without providing supporting evidence, ask for it. Coil Repair vs. Replacement: Making the Right Call The repair vs. replace decision on a failed AC coil comes down to three factors: coil material, leak severity, and equipment age.
August 3, 2026
 Commercial electrical failures don't wait for business hours. A tripped breaker or overloaded panel in an active facility means halted operations fast. Finding the right contractor before that call happens matters. Virginia is a large state. A contractor strong in Hampton Roads isn't dispatching to Roanoke or Harrisonburg. Geography shapes your decision as much as licensing tier. This guide covers the eight best commercial electricians in Virginia. Each was evaluated on license class, geographic coverage, trade depth, and how they actually serve commercial clients. What Are the Best Commercial Electricians in Virginia? VA Commercial Repair Solutions covers central Virginia and the Shenandoah Valley with Class A electrical and mechanical licenses. They offer 24/7 live staffing and a commercial-only focus. Bay Electric Co. has anchored Hampton Roads commercial electrical since 1964 with a $100 million bonding capacity. Harbor Construction Company serves Hampton Roads, Richmond, and Northern Virginia with Class A commercial and government electrical work. Parker Utilities brings multi-trade Class A capability — electrical, excavation, and security — across Northern Virginia, Richmond, and Hampton Roads. Hampton Roads Electric has served the Virginia Beach market with commercial and industrial electrical service for 25+ years. C&W Electrical Contractors covers Richmond with over 30 years of commercial electrical and fire alarm experience. McGrady-Lambert Electric serves Roanoke and the New River Valley with commercial and industrial electrical contracting. Benfield Electric has handled Northern Virginia commercial construction since 1968.
July 30, 2026
 A commercial heat pump that's running but underperforming is one of the costlier equipment problems to overlook. The system appears functional — it cycles on, air moves through the vents — but it's working twice as hard to deliver half the output. Energy costs climb. Comfort drops. Component wear accelerates. Unlike a system that fails completely, a heat pump losing efficiency rarely triggers an urgent call. The decline is gradual. By the time it's obvious, the compressor has been operating under stress for months and secondary damage has often occurred. This guide covers the essential tips to diagnose efficiency loss in a commercial heat pump, the repairs you or your maintenance staff can perform safely, and the failures that require a licensed HVAC technician with the proper certifications and tools. How Commercial Heat Pumps Work — and Why They Lose Efficiency A heat pump doesn't generate heat. It moves it. In cooling mode, it pulls heat from inside a building and rejects it outdoors. In heating mode, it reverses that process — extracting heat from outdoor air (or ground, for geothermal systems) and moving it inside. The reversing valve is the mechanical heart of this dual-mode operation. It's a solenoid-controlled valve in the refrigerant circuit that shifts the direction of refrigerant flow between heating and cooling modes. A reversing valve that's partially stuck, leaking internally, or failing to shift reliably is one of the most common sources of heat pump efficiency loss — and one of the most misdiagnosed. Efficiency losses in commercial heat pumps almost always have a diagnosable mechanical cause. The U.S. Department of Energy reports that a well-maintained heat pump operates 15–40% more efficiently than one that's been neglected. That gap is almost entirely preventable with systematic maintenance and early diagnosis. Tip 1: Clear the Outdoor Unit Start here before any other diagnostic step. The outdoor unit is where the heat pump exchanges heat with the outdoor air. Anything blocking that exchange reduces efficiency directly and immediately. Check the clearance around the outdoor unit. The standard requirement is at least 24 inches of unobstructed space on all sides. Vegetation, stored equipment, overgrown hedges, or debris pressed against the unit restricts airflow and forces the system to work harder to reject or absorb heat. With the system off, inspect the coil face for embedded debris — leaves, dirt, cottonwood seeds, or grease particulates in kitchen-adjacent installations. A heavily fouled coil surface meaningfully reduces heat transfer. Professional coil cleaning with the right chemicals restores heat transfer capacity and reduces system run time. Never use a pressure washer on coil fins — the aluminum fins are fragile and bend easily, permanently reducing airflow. Also confirm the unit is level. Heat pumps settle over time on improperly prepared pads. A unit that's significantly off-level causes uneven refrigerant distribution and oil return problems in the compressor. If the unit has shifted, a qualified technician should assess the refrigerant circuit before restarting. Tip 2: Replace the Air Filters A dirty air filter is the most common single cause of reduced heat pump efficiency — and the most overlooked. In commercial facilities, filters clog far faster than manufacturer replacement schedules assume. A kitchen environment, manufacturing space, or high-traffic building can destroy a filter in weeks. Remove the filter and hold it up to a light. If you can't see light through the filter medium, it needs replacing now — not at the next scheduled maintenance visit. Also check whether the filter has collapsed or pulled away from its frame. A filter that's bypassed allows debris to land directly on the evaporator coil surface. Replace the filter, but also check the evaporator coil itself for debris accumulation. A coil that's been operating with a bypassed or missing filter may have months of debris embedded in the fin surfaces. Coil cleaning is a technician task — but knowing the coil needs cleaning is something facility staff can identify during a filter check. Tip 3: Verify the Defrost Cycle Commercial heat pumps in heating mode regularly ice up at the outdoor coil in cold and humid conditions. That's normal. The defrost cycle is designed to reverse operation briefly, shed the ice, and return to heating mode. A defrost cycle that's not running — or not completing — allows ice to accumulate on the outdoor coil. Thick ice reduces heat absorption to near zero. The system continues running, consuming energy, while delivering almost no useful heat. Check for excessive ice accumulation on the outdoor unit during heating season. A thin layer of frost during operation is normal. A solid block of ice covering the coil is not. If ice has fully enveloped the outdoor unit, turn the system off, allow it to thaw fully, and then test the defrost cycle operation before restarting. Defrost cycle controls — the defrost board, defrost thermostat, and defrost timer or sensor — are inside the unit and require a technician to test properly. If the outdoor unit ices repeatedly after manual thawing, the defrost controls are the next diagnostic target. Tip 4: Inspect the Reversing Valve Reversing valve problems produce some of the most confusing symptoms in heat pump diagnosis. A valve that's stuck in one position delivers only heating or only cooling regardless of the thermostat setting. A valve that's internally leaking delivers weak output in one mode because refrigerant is bypassing the correct circuit. Listen for unusual sounds during mode transitions — when the thermostat switches from heating to cooling or vice versa, the reversing valve shifts and makes a distinctive sound. A valve that's slow to shift or shifts with a loud clunk is often in early-stage failure. A valve that doesn't shift at all produces no mode change. Check for temperature differences in the suction and discharge lines during operation. Internal valve leakage causes the suction line to be warmer than normal in cooling mode (refrigerant is bypassing back to suction) or the discharge line to be cooler than normal in heating mode. These symptoms confirm a leaking reversing valve — but diagnosing them accurately requires manifold gauges and a technician who knows what the design readings should be for your specific system. Reversing valve replacement is a licensed technician task. It requires recovering the refrigerant charge, brazing or replacing the valve in the refrigerant circuit, evacuating the system, and recharging. Do not attempt to work on the reversing valve without EPA Section 608 certification. Tip 5: Check Electrical Components — Capacitors and Contactors Capacitors and contactors are the electrical components most responsible for heat pump efficiency decline and starting failures. Both wear predictably over time. Both are identifiable before complete failure.
July 30, 2026
When a commercial oven dies mid-dinner service or a fryer goes down before the lunch rush, calling a residential appliance repair company is the wrong move. Commercial kitchen equipment runs on higher voltages, different gas pressures, and tolerances that residential technicians aren't trained to handle. The wrong diagnosis doesn't just waste time — it can void manufacturer warranties and cause additional damage to expensive equipment. The challenge in Virginia is finding the right specialist for the right region. The state covers a lot of ground — from the Shenandoah Valley to Northern Virginia to Hampton Roads — and the best repair company for a restaurant in Roanoke is a different answer than the best option for a kitchen in Arlington. This guide covers the six best commercial kitchen equipment and restaurant repair companies in Virginia. Each was evaluated on equipment coverage, technician credentials, geographic reach, and what they actually deliver for commercial food-service operators. Virginia's Top 6 Commercial Kitchen Equipment Companies VA Commercial Repair Solutions covers central Virginia and the Shenandoah Valley with a full-service kitchen, refrigeration, and exhaust hood practice under one Class A license. Quick Servant provides CFESA-certified commercial kitchen and cooking equipment repair across the state, including Northern Virginia, Richmond, and Hampton Roads. Wagner Food Equipment is Southwest Virginia's factory-authorized specialist for Hobart, Vulcan, and Wolf cooking equipment, with 200+ combined years of technician experience. CTS Kitchen Heroes offers 24/7 multi-trade kitchen equipment repair, refrigeration, HVAC, and hood cleaning across Richmond and central Virginia. Restaurant Equipment Repair, Inc. has served Richmond with factory-authorized cooking equipment service for over 40 years. Air Novations covers commercial kitchen equipment installation, repair, and maintenance throughout Northern Virginia.
July 30, 2026
 A commercial ice maker that stops producing is one of the fastest ways to lose revenue in a food-service operation. Bars run out of ice mid-shift. Restaurants can't serve drinks. Hotels disappoint guests during peak season. The problem compounds quickly. A food-service kitchen running without ice for even four hours faces real financial damage — lost drink sales, guest complaints, and health-code pressure if ice-dependent food storage is affected. This guide walks through every step of commercial ice maker repair. Some checks you can perform yourself. Others require a licensed technician with refrigerant-handling certification and specialized diagnostic tools. What Makes Commercial Ice Maker Repair Different? A commercial ice machine isn't a scaled-up version of the one in your home refrigerator. It runs continuous refrigerant cycles, processes dozens of gallons of water per day, and operates under constant load in a hot kitchen environment. The result is a repair process that's more complex than almost any other piece of kitchen equipment. Misdiagnosis is common — and expensive. A technician who swaps parts without isolating the actual failure point sends you back to a non-producing machine within weeks. CFESA trains and certifies technicians specifically for commercial food service equipment repair. When vetting a contractor for ice machine work, CFESA membership or factory brand certification is a meaningful credential — not just a marketing claim. Commercial ice machines also require EPA Section 608 certification for any work involving the refrigerant circuit. This isn't optional. Federal regulations prohibit refrigerant handling, recovery, and recharge by anyone without that credential. Verify your technician holds it before any refrigerant work begins. Before You Start: Safety and What You'll Need Safety first: Turn off the disconnect switch — not the control switch — before touching any internal components. The control switch cuts the ice cycle but leaves the unit powered. Only the disconnect switch removes power entirely. What you'll need: Towels and a bucket — water will be present, especially mid-cycle Flashlight — internal components are typically in dark bottom sections Multimeter — for basic electrical checks on valves and solenoids Water-quality test strips — useful if hard water is a known issue in your facility Before you call a technician, document: Was production declining gradually, or did it stop suddenly? Was ice quality poor (thin, hollow, misshapen) before output stopped? Any recent maintenance, moves, or service visits? That information helps a technician diagnose faster and reduces your service bill. Step 1: Check Power and Water Supply Start at the source. A significant share of commercial ice machine service calls trace back to power or water supply issues — not internal machine failure. Go to the electrical panel and check the circuit breaker feeding the unit. A tripped breaker is an immediate fix. If it trips again immediately after reset, stop — a recurring trip signals an overload or electrical fault that requires a licensed electrician. Check the disconnect switch at the unit itself. These are frequently left in the off position after maintenance visits and overlooked entirely. Also confirm the machine's power switch is in the on position and not stuck in a fault-hold state. On the water side, verify the supply valve is fully open. A partially closed valve reduces incoming water pressure, which leads to thin ice, hollow cubes, or the machine entering a pause cycle. Check the water supply line for kinks, especially if the machine was recently moved or serviced. Step 2: Perform a System Reset Commercial ice machines have a control board that logs fault conditions and locks the machine out when it detects a problem. When the machine fails, a deliberate reset sequence is required to clear the fault and restart. Turn the power switch off. Allow all ice on the evaporator to melt completely before proceeding — this may take 20 to 30 minutes depending on the machine and ambient temperature. Don't skip this step. Restarting with ice still on the evaporator triggers an immediate fault. Unplug the machine from its power source for at least 10 seconds. Reconnect power and restart. If the machine begins a normal freeze cycle, monitor it through at least two complete cycles before considering the issue resolved. A machine that restarts but fails within two cycles has an underlying fault the reset temporarily cleared. Note any error codes or fault lights displayed on the control panel — most commercial machines from Hoshizaki, Manitowoc, and similar brands display specific fault codes that narrow the diagnosis significantly. Step 3: Clean the Condenser Coils Dirty condenser coils are the most overlooked cause of reduced ice production in commercial kitchens. The condenser is where the machine expels heat from the refrigerant circuit. When coils are coated in grease, dust, or kitchen debris, the machine can't reject heat effectively. Reduced heat rejection raises head pressure throughout the refrigerant circuit. High head pressure forces the compressor to work harder and reduces cooling capacity across every freeze cycle. In hot commercial kitchen environments, a fouled condenser can cut ice production by 30% or more before the machine eventually fails entirely. Turn off power before cleaning. For air-cooled machines, use a commercial coil cleaning brush and work from the inside of the coil face outward to push debris out rather than deeper in. Never use a pressure washer — condenser fins are fragile aluminum and bend easily, which reduces airflow permanently. For water-cooled machines, the condenser is a water-to-refrigerant heat exchanger rather than an air-cooled coil. Scale buildup inside the water circuit reduces heat transfer. Water-cooled condenser cleaning requires a licensed technician and specific descaling chemicals. Step 4: Inspect and Replace the Water Filter A clogged water filter restricts flow to the water distribution system above the evaporator. The machine produces thin, hollow, or misshapen ice before stopping altogether. Hard water locations see filters clog far faster than the manufacturer's replacement schedule assumes. Remove the filter and hold it up to a light source. If you can't see light through the filter medium, replace it immediately. While the filter is out, inspect the filter housing for scale buildup or biofilm inside the housing walls. Clean the housing before installing the new filter. Water hardness has a direct impact on filter life and evaporator scale accumulation. The NSF/ANSI 12 standard for commercial ice machines recommends incoming water hardness below 10 grains per gallon for most equipment. If your facility consistently exceeds that, a water softener or inline scale inhibitor extends filter life and protects the evaporator. Also check water temperature entering the machine. Most commercial ice machines are rated at incoming water temperatures around 50°F. Warmer incoming water significantly slows freeze cycles and reduces daily ice output capacity. If your water is coming in consistently above 60°F, the rated output on the machine's nameplate doesn't reflect your actual production potential. Step 5: Inspect the Water Inlet Valve The water inlet valve controls water flow into the machine at the start of each freeze cycle. A valve stuck closed produces no water and no ice. A valve stuck partially open causes continuous water flow that can flood the bin, trigger the drain, or prevent proper ice formation. With power off, disconnect the water line at the inlet valve and inspect the screen for debris or scale. The inlet valve screen is a common clog point in hard-water locations. Clean it carefully with a soft brush and clean water. Reinstall and test. If the screen is clear but the valve isn't opening during a freeze cycle, test the solenoid coil with a multimeter. A failed solenoid reads open — no continuity between the terminals. That confirms valve replacement. Inlet valve replacement is a straightforward repair most licensed technicians can complete in a single visit with a stocked parts inventory. Some commercial ice machines use multiple water inlet valves — one for the main fill circuit and one for the purge cycle that dumps mineral-concentrated water at the end of each freeze. Test both if your model has them. Step 6: Check the Float Switch and Bin Control The bin control sensor tells the machine when the storage bin is full. When it reads full — even with an empty bin — the machine stops production and waits. A misaligned, damaged, or ice-covered bin control is a common cause of premature production stoppage. With power off, inspect the bin control sensor for ice accumulation, physical damage, or misalignment. Clear any ice blocking the sensor's detection path. On thermistor-style bin controls, confirm the sensor is making firm contact with its designated sensing surface. Thermistors that have pulled away from the surface read incorrect temperatures. The float switch monitors water level in the reservoir. A stuck float arm causes the machine to read the reservoir as full when it's empty, stopping the water fill cycle before the freeze cycle can start. With power off, manually depress and release the float arm to confirm it moves freely through its full range. If it feels sticky or catches, clean the reservoir and check for scale binding the float pivot. Step 7: Examine the Evaporator and Harvest Cycle The evaporator is the refrigerated surface where ice forms. Mineral scale on the evaporator reduces contact between water and the refrigerated surface, producing slow freeze cycles, thinner ice sheets, or ice that won't release cleanly at harvest. Commercial ice machines require deliming at intervals determined by your water hardness. Most manufacturers recommend deliming every six months at minimum. Quarterly deliming is appropriate for hard-water locations or high-volume operations. Manitowoc's maintenance guidelines specify descaling procedures by model, including correct descaler concentration and dwell time. Follow the manufacturer's procedure exactly — using the wrong concentration or contact time damages the evaporator coating. A harvest failure — where ice forms correctly but doesn't release from the evaporator — points to the hot gas harvest valve, a refrigerant imbalance, or a control board timing fault. The harvest valve opens briefly to push warm refrigerant gas back through the evaporator, warming it just enough to release the ice slab. A failed harvest valve stays closed and the ice never drops. Testing harvest valve function requires manifold gauges and refrigerant circuit access — a licensed technician task. Step 8: Diagnose the Refrigerant Circuit This step requires a licensed refrigeration technician. Do not attempt refrigerant circuit diagnosis or repair without EPA Section 608 certification. Refrigerant circuit issues in ice machines typically appear as long freeze cycles, soft or undersized ice, or a machine entering a safety lockout after running without completing a harvest. A technician will connect manifold gauges to the service ports and read suction and discharge pressures while the machine runs. They compare those readings to the machine's published design pressures for your ambient conditions. Deviation from spec identifies whether the issue is a low charge, a refrigerant leak, or a refrigerant restriction. If a leak is confirmed, the source must be found and repaired before the system is evacuated and recharged. Recharging a leaking system is illegal under EPA Section 608 and is a short-term fix at best. The refrigerant will escape again, and the second failure usually causes compressor damage from running in a low-charge condition. When an Ice Maker Can't Be Repaired Some ice machine failures lead directly to replacement. Knowing the difference saves time and prevents wasted repair investment. A failed compressor — one that tests open (ohms to infinity) or shorted to ground — cannot be repaired in the field. Compressor replacement on a commercial ice machine is often cost-prohibitive, especially on units over 7 years old. The cost of a replacement compressor plus labor frequently approaches or exceeds the cost of a new unit. A refrigerant leak in an aluminum evaporator coil is also irreparable in the field. Copper refrigerant tubing can be brazed and repaired. Aluminum cannot. VA Commercial Repair Solutions — with 17+ years in commercial refrigeration and kitchen equipment across central Virginia — identifies these failure types upfront. They show customers the meter readings and inspection results rather than simply asserting that replacement is needed. Preventive Maintenance Schedule Consistent preventive maintenance is what separates a commercial ice machine that lasts 12 years from one that fails in five. Use this table as your baseline — adjust condenser cleaning frequency based on how much grease and dust your kitchen generates.
July 28, 2026
 Commercial refrigeration failure is one of the costliest equipment problems a food-service business can face. A walk-in cooler that stops working overnight can mean thousands of dollars in spoiled inventory by morning. A broken ice machine brings service to a halt faster than almost any other single failure. The problem is that most HVAC contractors don't actually service commercial refrigeration. Walk-in coolers, ice machines, and commercial chillers require different certifications, training, and tools than standard commercial AC. Call an HVAC company for a refrigeration problem and you often get someone learning your equipment on your dime. This guide identifies the four best commercial refrigeration and ice maker repair companies in Virginia. We evaluated each on refrigeration-specific experience, equipment coverage, certifications, geographic reach, and how they serve commercial operators in practice. Virginia's Top 4 Commercial Refrigeration Companies at a Glance VA Commercial Repair Solutions is the dedicated specialist for the Shenandoah Valley and central Virginia. They cover refrigeration, ice makers, walk-in coolers, and kitchen equipment under one Class A license. Elite Service & Enterprises serves Hampton Roads with a commercial-only cross-trade model that covers refrigeration, HVAC, and electrical in-house. Oasis Heating, A/C & Refrigeration covers Northern Virginia's light commercial refrigeration needs alongside their core HVAC practice. Reliance Repairs focuses on commercial ice machine and refrigeration repair across Northern Virginia and the Washington DC area.